Tuesday, April 12, 2011

Pizza Party

 Ina's White Pizza with Arugula
 Antipasto Platter with Grilled Vegetables

 Sparkling Sidecar

I love the idea of having a pizza party with homemade pizzas. These recipes are found on the food network under Spring Entertaining. Giada de Laurentiis also has some homemade pizza recipes here and here.

Monday, April 11, 2011

Cake in a Jar

I've been making cakes for the last couple years, however I never knew that you could bake a cake in a jar! I LOVE this idea! Especially this rainbow cake, it's so fun to see all the colors through the glass.  One more wonderful idea that you can use a mason jar for! Check out the recipe for the rainbow cake in a jar at The Family Kitchen. The Cupcake in a jar is such a great way to present cupcakes in a fun way, and easy to take on the go! These are from The Cake Plate found on Intimate Weddings.

Sunday, April 3, 2011

Cinnamon Sugar Popcorn

This popcorn is AMAZING! You make it in the whirley-pop popcorn maker.

Combine in the Whirley-Pop:
  • 1/4 cup white popcorn kernals
  • 1/4 cup oil
  • 1/4 cup sugar
Cook over medium heat while stirring with lid closed until done. Once the popcorn is done add the cinnamon sugar mixture and stir for 2 minutes with the lid closed.

Topping Mixture:
  • 2 tablespoons sugar
  • 1 teaspoon cinnamon
  • 1/4 teaspoom salt
Making 

    Sunday, March 6, 2011

    Coconut Mojito

    I don't like a lot of drinks, but I do love Mojitos, and I also love Pina Coladas! So when I saw this recipe for Coconut Mojitos in People Magazine I had to write it down. I have been saving it for a while now and finally got to try it out now that I am no longer pregnant! They are really good and sweet; just how I like my drinks.

    Makes one drink

    Ingredients:
    • 8 mint leaves
    • ½ lime, cut into 4 wedges
    • ¼ cup coconut rum
    • 2 tbsp. sour mix
    • 1 tbsp. coconut cream, such as Coco Lopez
    • ¼ cup lemon-lime soda
    • ¼ cup club soda
    Place mint leaves and 3 lime wedges in a cocktail shaker and muddle. Add rum, sour mix and coconut cream, then fill shaker with ice. Close and shake well. Strain mixture into a glass, and top with lemon-lime soda and club soda. Garnish with a lime wedge.

    SERVING TIP: Serve in Mason Jar Mugs, $24 for a set of 6; potterybarn.com

    Sunday, February 13, 2011

    Peanut Butter Granola Bars

    I made these for Hudson as a snack and thought they turned out pretty good! You can alter the recipe to make it healthier by adding a dried fruit in place of the chocolate chips. I also saw on a review for the recipe that someone replaced the butter with canola oil. I needed to bake mine a little bit longer then the 15 minutes that the recipe calls for to keep them from falling apart. Refrigerating them may also help to keep them from falling apart. 

     Ingredients:

    • Vegetable cooking spray
    • 1 egg white
    • 1/2 cup chunky peanut butter
    • 1/3 cup brown sugar
    • 1/4 cup honey
    • 1/2 cup (1-stick) unsalted butter, melted
    • 2 cups old fashioned oats
    • 1/4 cup slivered almonds, toasted, *see Cook's Note
    • 1/3 cup miniature chocolate chips
    Directions:

    Position an oven rack in the middle of the oven. Preheat the oven to 350 degrees F.

    Spray a 7 by 10 3/4-inch nonstick baking pan with vegetable cooking spray. Lay a 6 by 18-inch piece of parchment paper in the pan, allowing the excess paper to hang over the sides. Spray the parchment paper lightly with cooking spray.

    In a medium bowl, using a hand beater, beat the egg white until frothy. Stir in the peanut butter, brown sugar, and honey. Add the melted butter, oats and almonds. Stir to combine, then add the chocolate chips.

    Using a rubber spatula, spread mixture into the prepared baking pan, pressing lightly to form an even layer. Bake until the edge of the mixture begins to brown, about 15 minutes. Remove from the oven and let cool for at least 1 hour. Cut into 1 1/2-inch squares and serve.


    *Cook's Note: To toast almonds, arrange in a single layer on a baking sheet. Bake in a preheated 350 degree F oven until lightly browned, about 8 to 10 minutes.

    Recipe by Giada  De Laurentiis

    Thursday, February 10, 2011

    Valentine's Day Cupcake


    Made some cupcakes for Amy's Birthday and decorated these for Valentine's Day. They are vanilla cupcakes with vanilla butter cream frosting, and they have a raspberry mousse filling. I piped on the hearts on top with some raspberry preserve. Then I rolled the edges of the cupcakes in white sanding sugar from Williams Sonoma. The cupcake liners are by Meri Meri, and can be found at Francesca's Collections. Happy Valentine's Day!

    Tuesday, January 4, 2011

    Max's Room


    We are expecting another baby boy at the end of February. His name will be Max Keller and we can't wait to meet this little guy! It is so nice that we will be able to reuse all of Hudson's clothing and baby things. I started working on Max's room a couple weeks ago and we were able to just buy a few colorful books and items to add to what we already had. I made him the pillow with the elephant applique on it, the blanket with his name, and painted the yellow letter "M" and framed it against some matching fabric. I am kind of obsessed with the jelly cat stuffed animals, so we placed a couple of those in his room. You can find them at Anthropologie, and they are the softest, cutest stuffed animals...in my opinion! :) I ordered the monkey bin from 3 sprouts on Amazon.com and will probably use it for a hamper or for toys when he is older. I also just ordered some alphabet flashcards to hang over the closet doors to brighten up that wall. I buy all of my soft fabric to make blankets from Create Your Own Joy Studio. She also sells blankets that are already made, along with other really cute baby items.

    Baby Girl Gift


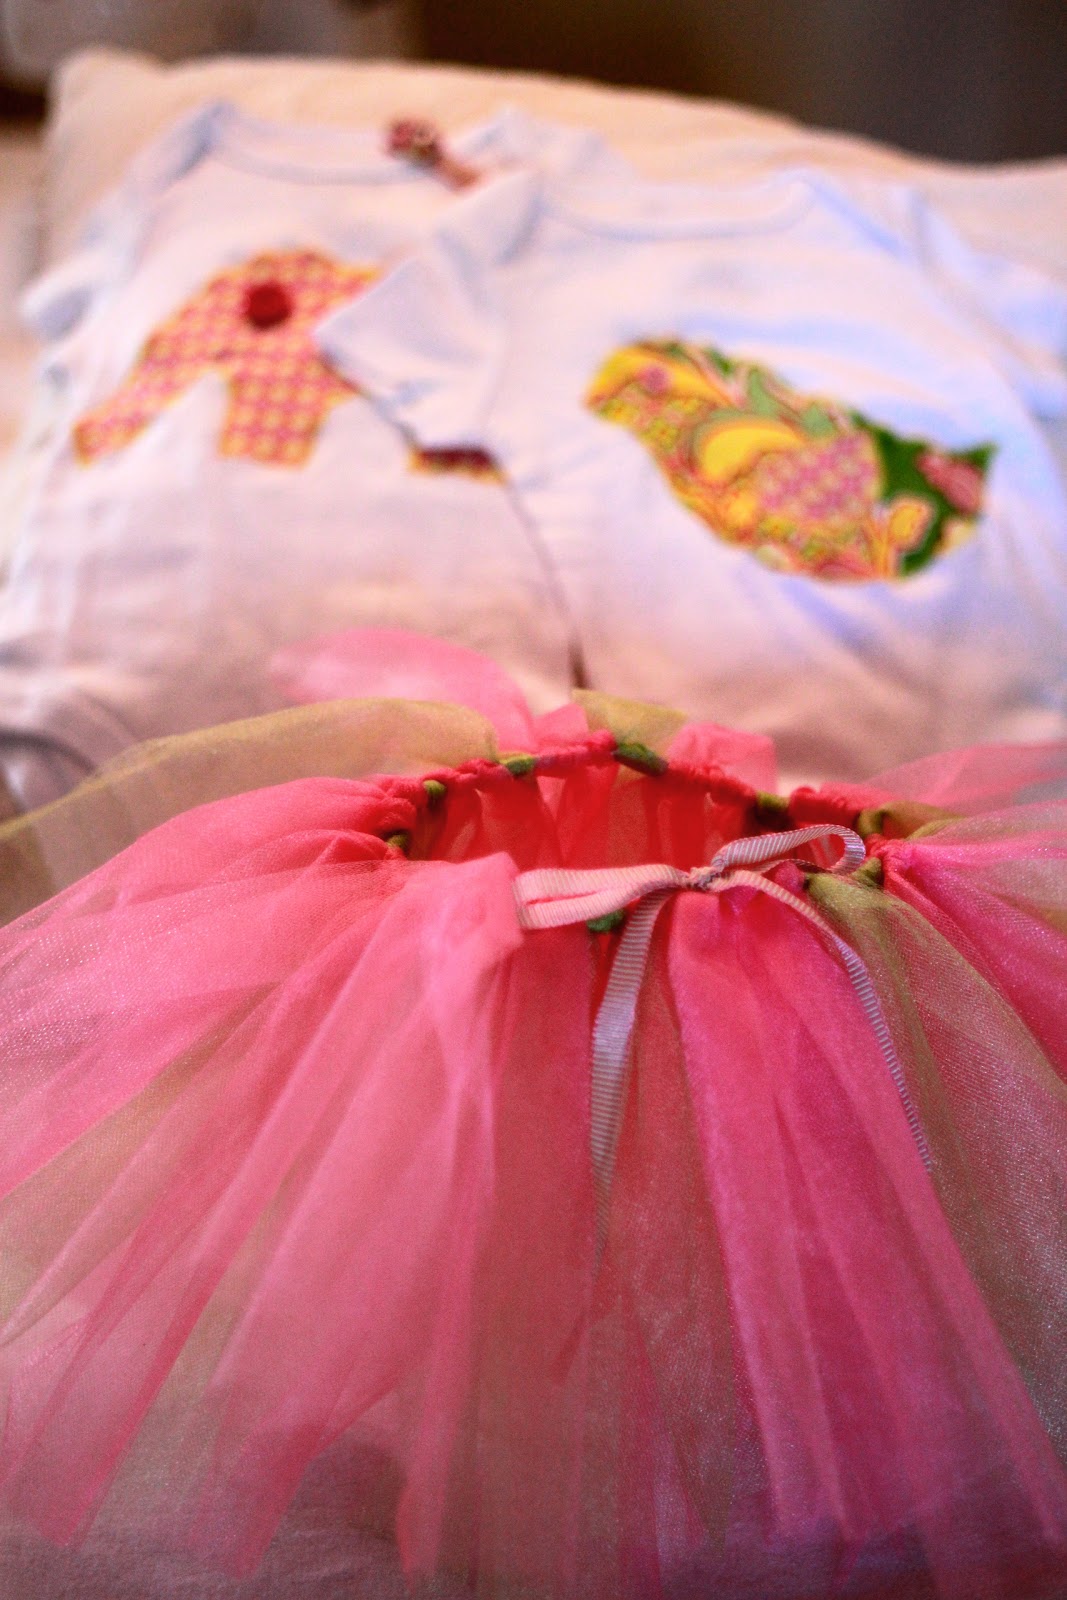
    One of my good friends Jenee is due just four days before me with a baby girl, Tyler Rose. Whenever any of my friends have a little girl I have to jump on the opportunity to make something fun. I made her a couple appliqued onsies, one with an elephant and another with a bird. The tutu is a no sew tutu that is really easy to make. I made the hair clip with ribbon that matches the tutu and a very small fabric yo yo that i made. I found the templates for the appliques on Daffodil Designs. I have link to a previous post on fabric yo yos here. It will direct you to Heather Bailey's website where she gives a step by step tutorial. Click here for a previous post I made about a no sew tutu, and it will give you the basic instructions and supplies needed.

    Saturday, December 11, 2010

    Coconut Cupcakes

    I made some coconut cupcakes for the first time this weekend for a winter themed baby shower. The shower was themed with snowflakes, the colors blue, white, and silver, and sparkly decorations. I tried to make the cupcakes fit right into that. I used a coconut cupcake recipe by Martha Stewart and topped them with cream cheese frosting. I topped some of the cupcakes with coconut that I tinted blue with an edible blue luster dust and the other half I topped with plain white shredded coconut. I decorated the tops with snowflakes that I piped out of melted Almond Bark. I placed the melted almond bark in a decorating bag with a tip #2. I piped the snowflakes onto wax paper and let them set in the refrigerator. Once they set I dusted them with blue and white shimmery luster dust and placed them on top of the cupcakes.


    Makes 2 dozen
    • 3 cups cake flour (not self-rising)
    • 2 teaspoons baking powder
    • 1 teaspoon salt
    • 3 sticks (1 1/2 cups) unsalted butter, room temperature
    • 2 1/4 cups sugar
    • 1/2 teaspoon pure vanilla extract
    • 1 cup coconut milk
    • 8 large egg whites
    • 1 1/4 cups shredded sweetened coconut
    • shredded sweetened coconut for garnish
     Directions:
    1. Preheat oven to 350 degrees. Line two standard 12-cup muffin pans with paper liners; set aside.
    2. In a medium bowl, whisk together flour, baking powder, and salt; set aside.
    3. In the bowl of an electric mixer fitted with the paddle attachment, beat butter and 2 cups sugar until light and fluffy, 3 to 4 minutes, scraping down sides of the bowl as needed. Beat in vanilla. With mixer on low speed, add flour mixture in three parts, alternating with the milk and beginning and ending with the flour; beat until just combined. Transfer mixture to a large bowl; set aside.
    4. In the clean bowl of an electric mixer fitted with the whisk attachment, beat egg whites on low speed until foamy. With mixer running, gradually add remaining 1/4 cup sugar; beat on high speed until stiff, glossy peaks form, about 4 minutes. Do not overbeat. Gently fold a third of the egg-white mixture into the butter-flour mixture until combined. Gently fold in remaining egg-white mixture; stir in shredded coconut.
    5. Divide batter evenly among the muffin cups, filling each with a heaping 1/4 cup batter. Bake, rotating pans halfway through, until the cupcakes are golden brown and a cake tester inserted in the center of a cupcake comes out clean, 20 to 25 minutes. Transfer pans to a wire rack. Invert cupcakes onto rack; then reinvert and let cool completely, top sides up. Frost cupcakes with seven minute frosting, swirling to cover. Cupcakes may be stored in a covered container in the refrigerator for up to 3 days. Garnish with fresh coconut just before serving.
    From The Martha Stewart Show, March 2008


    Read more at Marthastewart.com: Coconut Cupcakes - Martha Stewart Recipes

    Wednesday, November 17, 2010

    Pumpkin Ginger Snap Ice Cream Sandwiches

    I decided to make ice cream sandwiches with a fall or thanksgiving spin to them. So I made some homemade ginger snap cookies and scooped pumpkin ice cream in between. I used a store bought pumpkin ice cream from Trader Joe's and think I will make some with butter pecan ice cream also. I got the recipe for the ginger snaps at itsybitsyfoodies. The recipe I used is below:

    Ingredients
    • 1 cup sugar
    • ¾ cup butter
    • 1 egg
    • ¼ cup molasses
    • 2 cups flour
    • 1 Tbsp ginger powder
    • 1 tsp cinnamon
    • 2 tsp baking soda
    • ½ t salt

    Cream the sugar and the shortening (or butter).  Add the egg and mix in the remaining ingredients. Roll the dough into balls and roll the balls in sugar.  Place the balls on a greased baking sheet.  Flatten them with the bottom of a cup (one that is smooth, without any rims or edges) that is dipped in sugar each time.  Bake the cookies at 350 degrees for 10 minutes or until they done.  They will set as they cool so if you want chewy cookies, remove them from the oven when they still look soft and lightly golden around the edges.

    Thanksgiving Stuffing


    This is the stuffing recipe that my family makes every year for Thanksgiving. My mom created it by combining several different recipes that we have used in previous years. Stuffing is my favorite dish on Thanksgiving, I love the apples and nuts in this recipe and it is never too dry. Usually my mom makes me my own pan of stuffing without the sausage, but the sausage adds a lot of great flavor to the recipe.

    Ingredients:
    •  2 eggs, beaten
    •  1 stick of butter
    •  1 onion, minced
    •  5 stalks of celery, minced
    •  2 cloves of garlic, chopped
    •  1 32oz container of chicken broth
    •  1/2 tsp of salt
    •  1/2 tsp of pepper
    •  1 tsp of sage
    • 1 tsp poultry seasoning
    •  fresh parsley chopped
    •  1 large bag of seasoned bread cubes
    •  1 jiffy cornbread mix, prepared and crumbled
    •  1 sleeve of saltine crackers crumbled
    •  2-3 granny smith apples cubed
    • 1 lb of Jimmy Dean Sausage
    • 11/2 cups pecans chopped

      Directions:

    Saute celery, onion, salt, pepper, and garlic in butter in a pan until tender. Then in a large bowl mix together the saltines, corn bread, and seasoned bread cubes. Next add the celery mixture to the bowl.
    Saute sausage in separate pan and add to the large bowl. Add eggs, chicken broth. (Add the chicken broth gradually until the stuffing mixture is moist, but not soggy)  Season the mixture with the sage, parsley, poultry seasoning, and, salt and pepper as desired. Add the chopped pecans.
    Place in a buttered 9x13 cassarole dish and bake at 350 for 45 minutes to 1 hour. Cook for 30 minutes covered with foil and 15 minutes uncovered. (Usually this recipe will make enough to also fill a buttered 8x8 pan as well as the 9x13)

    Saturday, November 6, 2010

    Baked Chicken Fingers

    I really like this recipe for a number of reasons: it's easy, it's healthy, and Hudson loves them! They're pretty tasty and the wheat germ, bran, and flax seed add lots of nutritional value. I've also made these before without the unprocessed bran because I didn't have any in the house and they were still great.

    Ingredients:
    Serves 4
    • 1/2 cup wheat germ
    • 1/2 cup unprocessed bran
    • 1/4 cup plain dried breadcrumbs
    • 2 tablespoons ground flax seed
    • 2 tablespoons grated Parmesan
    • 1/2 teaspoon onion powder
    • 1/2 teaspoon garlic powder
    • Coarse salt and ground pepper
    • 1 tablespoon olive oil
    • 2 large eggs
    • 1 1/2 pounds chicken tenders (about 16)
    • Barbecue sauce, for serving (optional)
     Directions:
    1. Preheat oven to 450 degrees. In a food processor, combine wheat germ, bran, breadcrumbs, flax seed, Parmesan, onion and garlic powders, 1 1/2 teaspoons salt, and 1/4 teaspoon pepper; pulse to combine. Add oil; pulse to combine. Transfer crumb mixture to a large bowl.
    2. Set a wire rack on a rimmed baking sheet. In a shallow bowl, lightly beat eggs. Dip chicken in eggs (allowing excess to drip off), then dredge in crumb mixture, patting to adhere. Place on rack, and transfer to oven.
    3. Bake until chicken is opaque throughout, 12 to 14 minutes. Serve with barbecue sauce, if desired.


    Read more at Marthastewart.com: Baked Chicken Fingers - Martha Stewart Recipes

    Saturday, October 30, 2010

    Pumpkin Party


    We took Hudson to a pumpkin party today to paint pumpkins and he had such a great time. He didn't understand that the paint was for just the pumpkin and insisted on painting his face as well. I love all the creative party ideas that you can do for Halloween. My friend Lisa and her Mom hosted this party and I had to show some of the cute pictures from today! The cupcakes were really adorable and the sandwiches were in shapes of pumpkins and bats. They also had an orange punch with gummy worms in it. Everything was really cute!

    Lollipop Cookies


    I made these Halloween lollipop cookies with Hudson today to give to some of his friends on Halloween. I of course got the idea from Martha Stewart, you can click here for her recipe and directions. Here's how I made mine:

    Ingredients and Supplies:
    • Sugar cookie dough, store bought
    • 1-2 tablespoons flour
    • Orange and black sprinkles
    • Lollipop Sticks 
    • Treat Bags
    • Orange and black ribbon
    I just used a sugar cookie mix to make it even easier. Hudson liked helping me roll the balls of dough in the colored sugar and that is a great job for the little ones! I found the orange and black sprinkles at Michael's and used different orange and black ribbon that I already had at home. The lollipop sticks and the favor bags are also from Michael's.

    First preheat the oven to 350 degrees. Then I mixed 1 to 2 tablespoons of flour into my store bought sugar cookie dough to keep it from stick to my hands as I rolled out the balls. Then I began to roll the dough into balls, using about 1 to 2 tablespoons of dough for each. Then roll the balls into the sugar, or let your little ones help with that part! Next place the lollipop stick slightly into the balls and lay flat on a cookie sheet, like they are shown in the picture above. Next I used one of my glasses that has a smooth flat bottom to slightly flatten each cookie. (You want to make sure you are making your cookies small enough to fit into the treat bags.) Bake for 8 to 10 minutes or until cookies are lightly golden brown. Carefully move to a cooling rack and let sit until they are completely cooled. Then place each one into a treat bag and tie closed with a ribbon.

    Wednesday, October 13, 2010

    Halloween Blondies

    I made caramel covered apples and these Halloween Blondies last year for a festive Halloween treat. The recipe for the blondies is below:


    Ingredients:
    • 1 cup (2 sticks) unsalted butter, melted, plus more, room temperature, for pan
    • 1 cup packed light-brown sugar
    • 1/2 cup granulated sugar
    • 2 large eggs
    • 1 1/2 teaspoons pure vanilla extract
    • 2 cups all-purpose flour (spooned and leveled)
    • 1 1/2 teaspoons coarse salt
    • 1/4 cup each orange, yellow, and brown candy-coated chocolates (from a 12.6-ounce bag)
     Directions:
    1. Preheat oven to 350 degrees. Brush an 8-inch square baking pan with butter; line pan with parchment paper, leaving a 2-inch overhang on two sides. Butter paper.
    2. In a large bowl, whisk together butter and sugars until smooth. Whisk in eggs and vanilla. Add flour and salt; stir just until moistened. Transfer batter to prepared pan and smooth top. Arrange candies in 12 rows (2 rows per color, repeating once) on top of dough.
    3. Bake until top of cake is golden brown and a toothpick inserted in center comes out clean, 45 to 50 minutes. Set pan on a wire rack and let cool completely. Using parchment overhang, lift cake from pan and transfer to a cutting board; cut into 16 squares. (To store, keep in an airtight container at room temperature, up to 2 days.)
    Read more at Marthastewart.com: Halloween Blondies - Martha Stewart Recipes

    Pumpkin Pie

    I had this pumpkin pie for dessert the other night and had to get the recipe. It is sooo delicious! The recipe is from All Recipes.com it is the Brown Family's Favorite Pumpkin Pie. What makes it so unique is that it has a walnut streusel topping that tastes wonderful with the pumpkin underneath! The one made in the picture above was made as a tart with caramel drizzled on top. You can check out all the variations at allrecipes.com. Here is the original recipe below:


    Ingredients

    • 1 (15 ounce) can pumpkin puree
    • 1 (14 ounce) can sweetened condensed milk
    • 2 egg yolks
    • 1 teaspoon ground cinnamon
    • 1/2 teaspoon ground ginger
    • 1/2 teaspoon ground nutmeg
    • 1/2 teaspoon salt
    • 2 egg whites
    • 1 (9 inch) unbaked pie shell

    • 2 tablespoons all-purpose flour
    • 1/4 cup packed brown sugar
    • 1 teaspoon ground cinnamon
    • 2 tablespoons butter, chilled
    • 1 cup chopped walnuts

    Directions

    1. Preheat the oven to 425 degrees F (220 degrees C).
    2. In a large bowl, mix together the pumpkin, sweetened condensed milk, and egg yolks. Stir in 1 teaspoon cinnamon, ginger, nutmeg, and salt. In a large glass or metal bowl, whip egg whites until soft peaks form. Gently fold into pumpkin mixture. Pour filling into pie shell.
    3. Bake for 15 minutes in the preheated oven. While the pie is baking, prepare the streusel topping: In a small bowl, combine the flour, brown sugar, and 1 teaspoon cinnamon. Blend in the cold butter with a fork or pastry blender until the mixture is crumbly. Mix in the chopped nuts. Sprinkle the topping over the pie.
    4. Reduce the heat to 350 degrees F (175 degrees C). Bake an additional 40 minutes, or until set.


    Schnepf Farms

    Schnepf Farms Pumpkin & Chili Party
    Thursdays, Fridays and Saturdays, October weekends
    5:00 p.m. - 8:30 p.m.  

    *Buy discounted tickets for $10 at Fry's and kids 2 and under are free

    Your admission includes: hay rides, pig races, bon fires, marshmallow roasting,
    roller coaster, 10 acre and 4 acre maze, Frisbee dog show, outdoor movies, swing-
    ing lady bugz, flying farmers, country road rally, carousel rides, and entertainment.
    Extra costs: food, pumpkins & train ride 

    Schnepf Farms is located on Rittenhouse Road in Queen Creek, 
    24810 S. Rittenhouse Road. 
    Visit website for current directions. WWW.Schnepffarms.com.

    Domestic Bliss


    I love all of the Fall and Halloween decor at Domestic Bliss. Especially their handmade fabric pumpkins that they sell each year. If you have never been over to the store, they are located in downtown Mesa and have lots of really great home decor and gifts. These pictures are some that were recently posted to their blog.

    Friday, October 1, 2010

    Restaurant.com

    Get 90% off Select Restaurant Gift Certificates TODAY at Restaurant.com. Enter Promo code WOW.
    You can buy $25.00 gift certificates for only $1.50. Most of these require a minimum purchase of $35.00, but it's still a great deal! After you place your order you are e-mailed a link to print your certificates. You can search restaurants by zip code.

    Saturday, September 25, 2010

    Gender Reveal Party


    The first time I read about the idea of having a party to reveal your baby's gender, I knew I wanted to do it the next time I was pregnant. I think it's a great reason to gather you family and friends together to celebrate together! I have been loving the colors grey and yellow together so I decided to use those colors to decorate the party. We had the party in the evening and served desserts and drinks. I made a small cake that revealed that we are having another little boy! We had all of the guests gather around when we cut the cake and I had filled it with layers of lemon mousse with blueberries and a layer of whipped cream filling that I colored blue. It was a fun way to announce the news! I also made a chalk board for people to vote either boy or girl before we cut the cake. After the cake was cut we had everyone write name ideas on the chalk board.