Sunday, April 13, 2014

Box of Sunshine


I love this idea, and I am sure most of you have seen it all over Pinterest! But I was excited to get to put together a "Box of Sunshine" for my Dad recently, who was recovering from surgery.
It's such a cute idea and you can change up what you put inside. This would be a fun thing to put together as a random act of kindness to leave on someone's doorstep. I would love to do that with my boys. They had a lot of fun helping me put this one together. There are lots of free printables out there, and now I can't find where I originally found mine. But if you look on Pinterest you'll find several to choose from! I added yellow tissue paper and wrapped the box in yellow cray paper. 


Whose day will you brighten with a Box of Sunshine?

Monday, February 17, 2014

Max's Rocket Party


Loved celebrating Max's 3rd Birthday this weekend! He has been talking about his "Rocket Party" for weeks and it was so great to see him loving every minute of the party! Love this little guys excitement  and sweet heart!


There are lots of tutorials out there for making these adorable jet packs. I knew Max would love one! I made this one using 2 2-liter soda bottles, 2 paper cups (spray painted silver), yellow cray paper, cotton balls, and duct tape. 


 The kids built rockets that I had prepared by filling water bottles with water, glitter, and star confetti. I glued the lids on and also glued the rocket tops on. The kids colored on papers that I had pre-cut to wrap around the rocket and to use as fins. I had markers, chalk, washi tape and stickers for them to use to decorate their rockets.

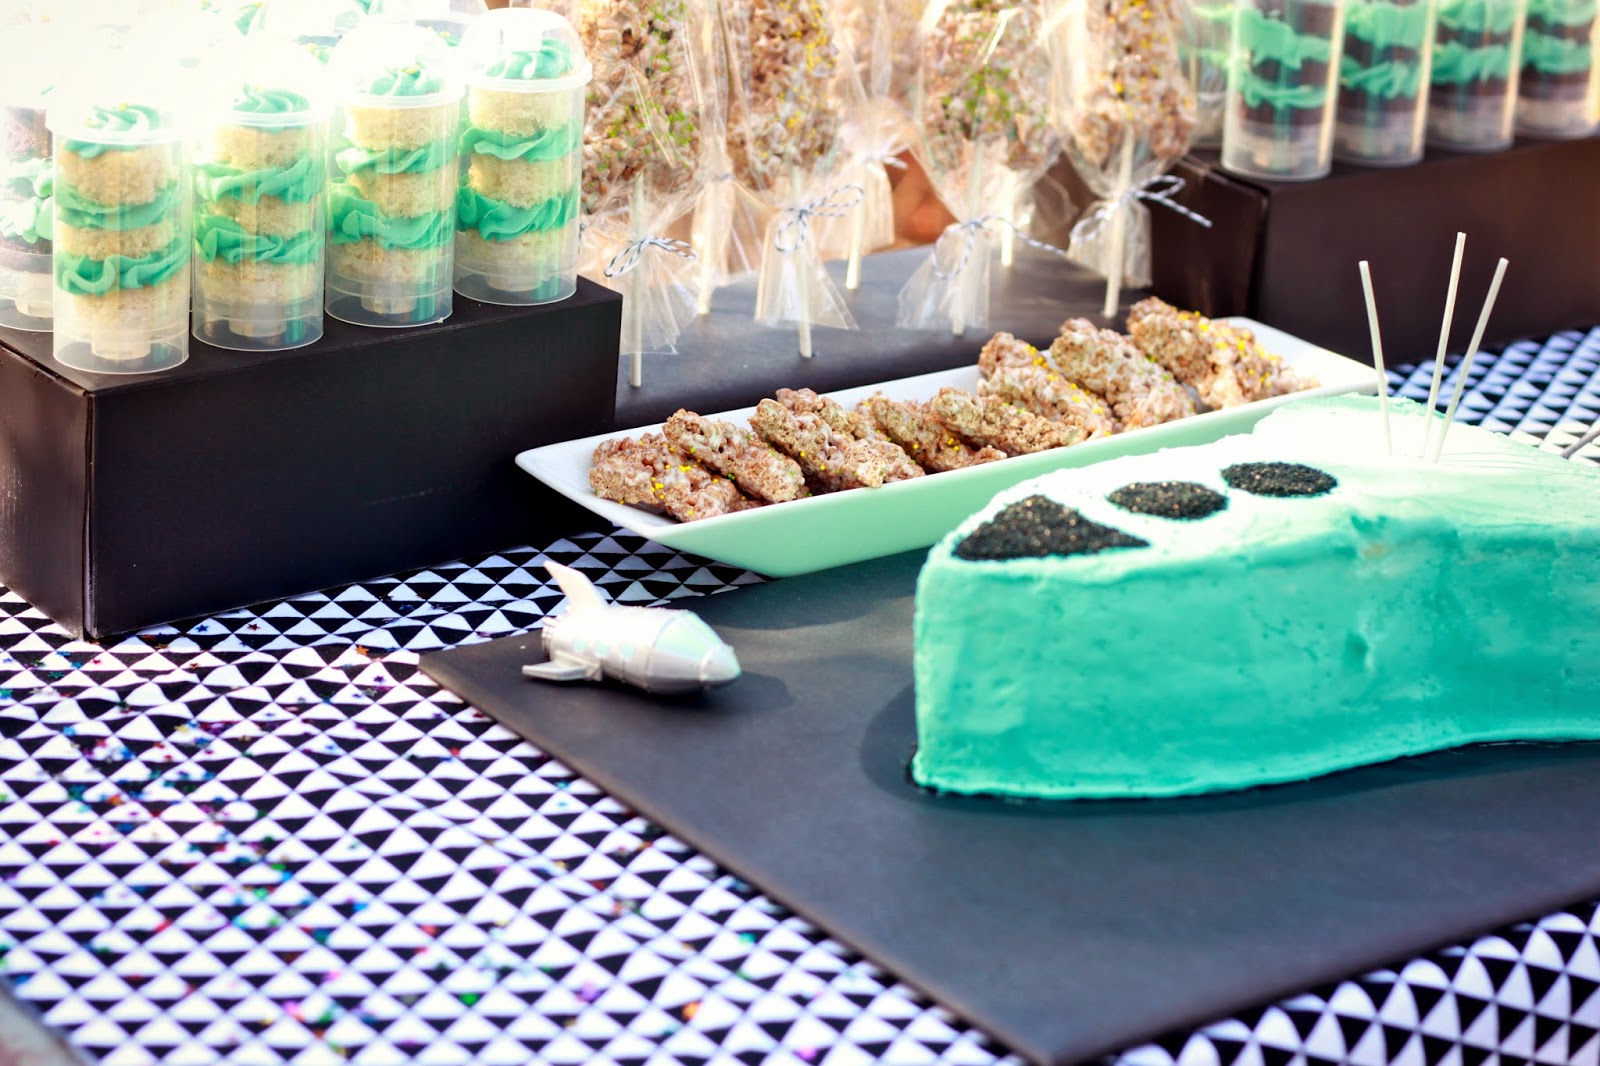
 For treats we had push up pops and rice crispy treats shaped like rockets and stars.

We also had fruit kabob rockets made with watermelon, banana, and canned pineapple. 


I used a template of a rocket that I cutout using my silhouette machine to create a rocket shaped cake that we placed candles and sparklers in. I used black sprinkles and the template to add the shapes on top.


The kids all went on a "moon rock hunt". I filled easter eggs with starbursts, glow in the dark stars, tattoos, and some rainbow loom bracelets. My boys had fun wrapping all the eggs in foil to make them into moon rocks. The kids had fun finding them and unwrapping them to find their surprises inside. 


Sent the kids home with mini nerf rockets as a party favor.


Sunday, January 19, 2014

DIY Lit Floral Centerpiece


Here is a really pretty and simple to make floral centerpiece idea. I put these together for an evening baby shower, however they would be great for any occasion! The led lights inside of the mercury glass create a beautiful glow. Follow the detailed steps below to create your own!

First mix together your flower food with 1 quart of water. You will want to use a container with a pouring spout.

Pour water about halfway up each water tube. Place lid back onto the water tube and stick 2-3 different florals in each tube.

Place your battery powered led light strands in each of your vases. 
I found mine at Target on clearance for under $5 each.

Begin placing your florals in the vase, arranging them to create a balanced centerpiece. You may need to go back and trim different stems shorter once your have all of the flowers in place. I also used fake succulents to help fill the vase. I found mine on Save-on-crafts.com


Thursday, January 2, 2014

Popeye Pancakes


Casey grew up eating popeye pancakes, so it has been fun to start making them for our family. The kids love watching them puff up in the oven and they love eating them even more! If you've never had them before, I would say they are a mixture of an egg dish and kind of like french toast a little bit too. They are really simple to make with just a few ingredients, and you can top them with whatever you'd like! 

Ingredients:

-1/4 cup butter
-6 eggs
-1 cup milk
-1 cup flour
-1/2 teaspoon salt
-toppings (we used powdered sugar, berries, maple syrup, and cinnamon and sugar)

Directions:
Preheat oven to 425 degrees. Place your butter in a glass 13x9 pan in the oven to melt while the oven is preheating. Meanwhile, whisk together the eggs and milk. Stir together the flour and salt and slowly beat into the egg mixture. Pour into the baking dish on top of the melted butter. Bake for 20-25 minutes. It will puff up and become golden brown on top. Remove from the oven and serve warm with your choice of toppings.


Wednesday, January 1, 2014

Merry Christmas & Happy New Year!

Hope you all had a very Merry Christmas and a Happy New Year! I love this time of year, however every year I battle against the business of the holidays and life in general. I have to limit myself with what I try to take on and accomplish. Which is also why I haven't posted anything in a while. This last year has felt crazy for us with three little ones running around, moving, and remodeling our home. We really tried to slow down a bit this holiday season to enjoy time with family and celebrate the birth of our Savior. The kids did all end up getting sick the week of Christmas, which caused lots of sleepless nights, but we are starting to get back into our daily routine. 

One thing I did want to accomplish this year, was sending out a Christmas card! I think it has been a few years since I sent one out. I wanted to capture us in our new home doing something together. So I set us up with some cookie dough and let the boys decorate cookies. My sister helped snap some shots of all of us...and it did get a little crazy. That's usually how it goes around here anyways, but there was flour and cookie dough all over the floors when we were done taking pictures. Max was crying because Hudson threw flour in his face, Piper was walking around eating raw cookie dough off the floor, and I was trying to take deep breaths. We did get some great pictures though, and the kids had fun! 

Here are some of my favorite pictures from the day...


Wednesday, December 11, 2013

DIY Felt Christmas Pillow

 This is a really easy pillow to make with very little sewing. It is made with felt, which will not fray. I love the way it turned out and cost me under $10 to make!
(I had some of the supplies laying around the house.)

Supplies:
- 1/2 yard cream felt fabric (at least 38" wide)
-16" pillow insert (that's just the size I already had on hand)
-White thread
-Green felt leaves (I found mine at target in their Christmas decor, but you could cut your own)
-White pom poms (you can find bags of them loose at the craft store, I just had some on a strand so that's what I used)
-Hot glue gun and glue sticks

Directions:

I made a simple envelope back pillow case and because I used felt I only had to sew along each side and didn't need to worry about hemming the other sides. 

First you will need to calculate what size to cut your fabric based on the size of your pillow. For the length you will double the size and add 6. My pillow was 16" square. These are my calculations:

16 + 16 + 6 = 38"length

For the width you will take the pillow size and add .5"

16 + .5 = 16.5" wide

Cut your fabric to your size. Mine was 38" x 16.5". 

Next lay your pillow on your fabric with the right side of the fabric facing up. Fold the fabric around the pillow, overlapping it to create an envelope back. Pin along the sides where the fabric overlaps and then slide your pillow out.

Now pin along both sides and sew. When you are done sewing each side, turn the pillow case right side out. 

Arrange your felt leaves in the shape of a wreath and using a hot glue gun, glue it in place.

I wanted a neutral colored pillow, so I covered the red berries on the original garland with the white pom poms using the hot glue gun.