Showing posts with label craft. Show all posts

Friday, April 18, 2014

Froot Loop Sand Art with Gospel Colors


I wanted to put together a craft for the kids on Easter and came across Froot Loop Sand Art and thought it looked like something the kids would enjoy doing. I also came across the gospel colors with jelly beans...so I thought I would combine the two. We had to make some of the Froot Loop colors work... purple was the closest to black for sin and yellow closest to white for forgiveness. 
I loved the conversation it brought about with my oldest son as we poured the different symbolic colors into our vase. We plan on doing it again on Easter morning with friends. 

Here is a layout of what we had each color represent and a verse for each topic. We poured the "sand" in the vase in that order so we could talk about each one as we layered them.


 First have your kiddos separate all the colors into piles.
Great color recognition for the younger ones!

Next place each color in a sandwich size ziploc bag. Make sure to release all the air and seal it shut. Let your little ones crush the Froot Loops into sand! My boys loved this part!
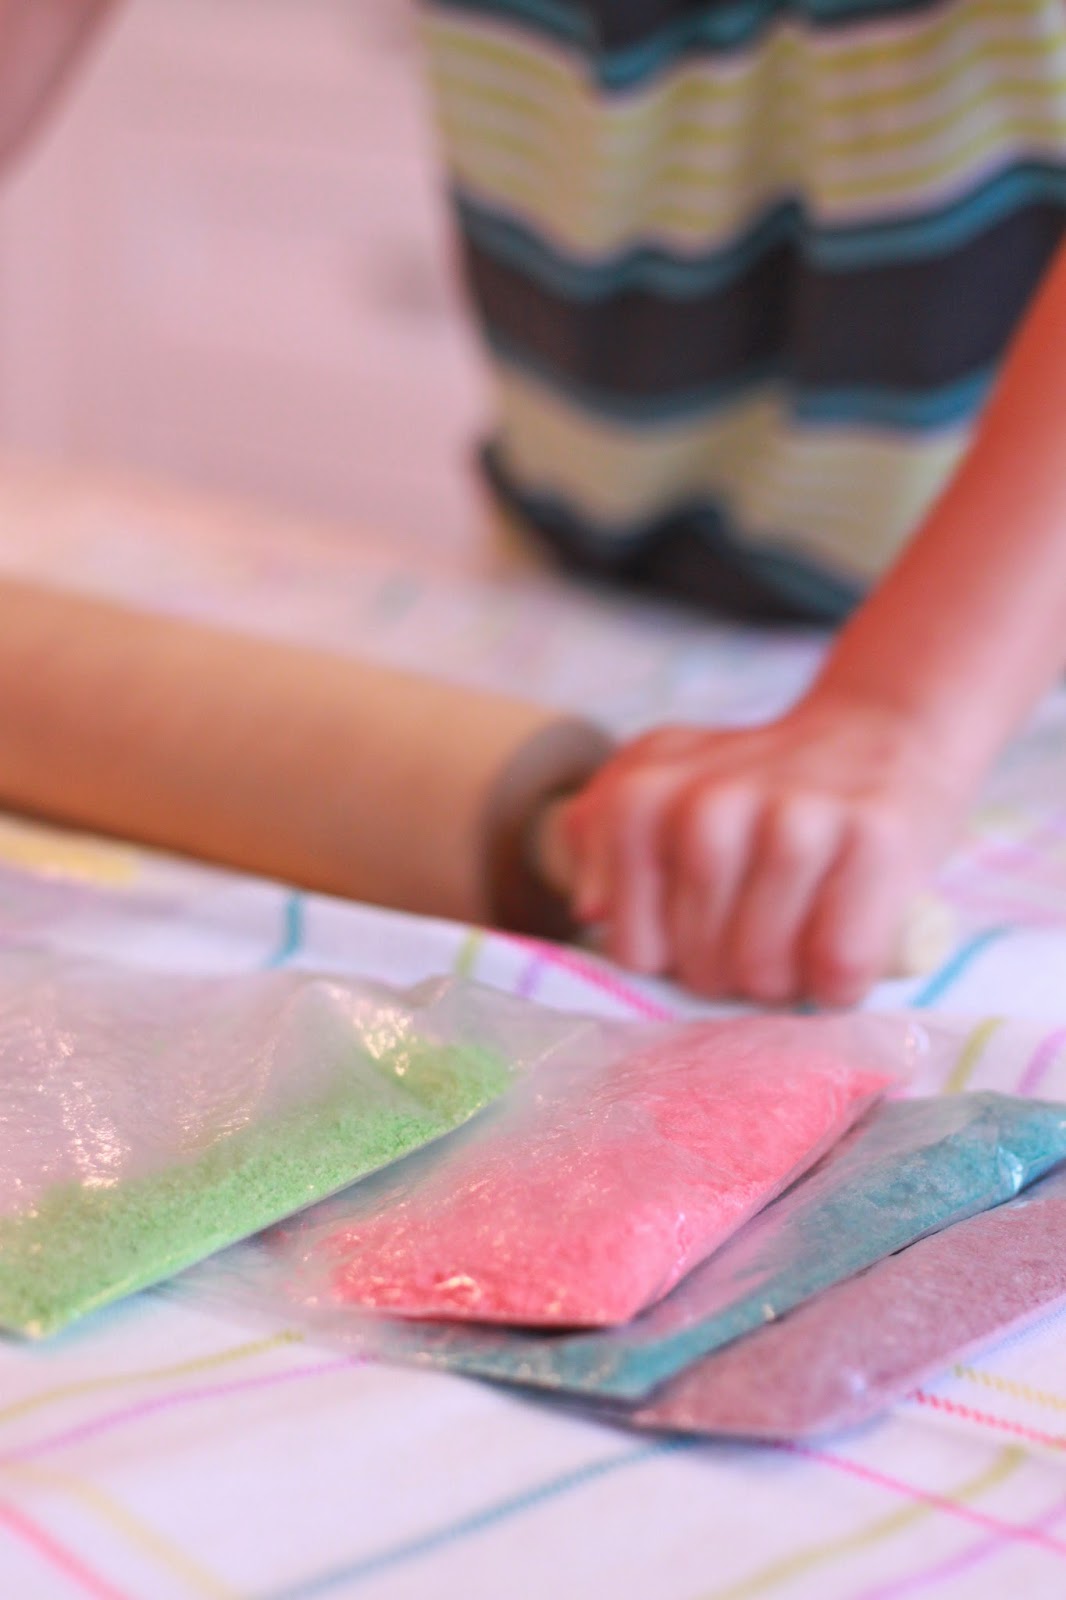

We used a funnel to pour our "sand" into a glass vase.
You could also just use plastic cups.


And that's it! 
A fun craft that also opens up an opportunity for great conversation and learning for your little ones! 


SUPPLIES:


Sunday, November 24, 2013

Make Your Own SNOW


Came across this fun winter activity at Growing a Jeweled Rose, along with lots of other great kids activities! You can make your own snow with items you most likely already have at home. My boys loved it, especially the part where you make them foam and grow by spraying them with vinegar! 


 You will need:
-Shaving cream
-Baking soda
-Vinegar, in a spray bottle
-Glitter (optional)
-Sensory tubs

 Place the baking soda in the tub.

Add some shaving cream and mix it together. The "snow" should start sticking together.

Spray your snowballs with vinegar and watch them foam!


Wednesday, September 25, 2013

DIY Sign with Reclaimed Wood

I have been making quite a few Halloween crafts this week, and this one could be customized for any holiday or just as a year round sign to display in your home. My in-laws brought me a whole bunch of reclaimed wood that they found, and I love the white washed boards that I used for this project. I was actually able to make this sign using all items I already had at home. Here is what you'll need:

-A piece of reclaimed wood, size will depend on what you plan to put on it
-Paint, I used a Folk Art black acrylic paint
-Stencil or cut your own using silhouette machine and cardstock
-Sponge brush
-Tape
-Sandpaper

Thursday, November 10, 2011

DIY Glitter Frame

I made this frame for my sister's bridal shower coming up. It is a cocktails and cupcakes shower with lots of shiny, sparkly, glittery decorations! Can't wait to celebrate with her and all the girls!


I bought the old frame for $0.75 at Goodwill and used some silver spray paint I already had. The tacky spray and glitter I bought at hobby lobby on sale and with coupons and I have lots leftover for more fun projects. The printable in the frame I found at Salt & Paper, an adorable online store with all kinds of printable art and stationary. You can find the Keep Calm printable HERE, for free! You can even customize the color of the printable from many selections before downloading.


 Linking up HERE!

Tuesday, September 13, 2011

Halloween Bat Craft

 I made this Halloween Bat this morning with Hudson. It is made from a recycled egg carton. I found the idea on Pinterest here via Enchanted Learning. I know Halloween is still over a month away, but I am kind of over Summer and ready for Fall! Hudson also keeps telling me "I am SO excited for Halloween!!!"...So I thought we would make something "Halloweenish" today since he has a bit of a wait ahead of him! You will need:
-Egg carton
-Ribbon
-Glue

Here is how we made ours:

 Start with an empty egg carton and cut the top and sides off so it looks like this.

Each egg carton can make 4 bats, so cut the carton into sections like this. You will need to trim the backs down so that it can sit flat.

Next cut out  each side to make the bats wings. Then spray paint each bat black.

 Now that the bat has dried you child can help with this part. Have you child place glue on the backs of the eyes and place them onto the bats face.

 Make a small hole in the top of the bat's head and have your child push the ribbon through the hole. Tie a couple knots to keep the ribbon from pulling through. And you're done! Now you can hang the bat somewhere in the house as a Halloween decoration. 


Friday, May 27, 2011

Liquid Sidewalk Chalk

You can find this recipe on a lot of different blogs out there, when I first saw the idea I knew I had to make some for Hudson. He loves it!
All you do is mix 1 cup of water with 1 cup of cornstarch. Then pour it into muffin tins or small cups. Next, add food coloring to make the colors you would like. I used food coloring gels and it made some very bright and vibrant colors! I found my recipe here at Smashed Peas and Carrots.

This was Hudson when we started...I should have taken an after picture. By the end he was down to his undies and covered in chalk! He had more fun painting himself then the sidewalk.


Tuesday, May 24, 2011

Make a Pillow from a Sweater

I love these pillows that are made from an old sweater, what a great idea! Found these on Tip Junkie and they are made by Megan at Brassy Apple. You can get all the details here.

Tuesday, April 26, 2011

DIY Doily Lamp

My sister came across this DIY Doily Lamp idea in her search for wedding ideas. I think this is such a cool way to recycle and reuse a doily. Found this great idea by More Design Please and you can get all the details here at DOS Family.

DIY Dressform


Wow, I love this project! I don't know if I will get around to making one, but maybe one day. I love the way she used an old lamp base and vintage book pages and newspaper to create it. You can find all the details to this project by Songbird here.

Wednesday, September 1, 2010

Craft Store Coupons

 It's been a while since I've posted some links to coupons. Here are some for the rest of this week and into labor day for Micheal's and the wonderful Hobby Lobby.

Michael's 40% off Coupon Expires Sept. 4th 2010


Michael's 20% entire purchase Expires Sept. 4th 2010

Coupons from Mommy Saves Big

Click here for Michael's labor day coupons up to 50% off

Hobby Lobby 40% off coupon Expires Sept. 4th

Thursday, August 5, 2010

Noodle Craft

I've been trying to find new things to keep Hudson entertained during these hot summer months, when we seem to be inside most days. Today I filled up a large plastic bowl with some uncooked noodles for him to play with. We got out all different sizes of cups, bowls, pots, and spoons. He had so much fun just pouring the noodles into all the different containers. After about an hour of playing, he began to lose interest so I folded a paper plate in half and had him pour some noodles into the middle. I stapled up the sides and then we colored the plate together. Now he has his own little instrument to shake while he dances.

Felt Food

Hudson has loved playing with toy kitchens and pretend food for a while now. We still haven't gotten him a play kitchen, but he has some pots and pans and some pretend food. I would love to make him some of these adorable felt food kits. These pictures are from American Felt and Craft. You can purchase their patterns along with all of the supplies to make each item on their website. There are lots of great ideas online for felt food. I will hopefully find some time to make some soon for Hudson.

Saturday, July 10, 2010

TuTu

Most of my friends have all boys... so now that my friend Amy is pregnant with a little girl, I had to jump on the opportunity to make something fun and extra girlie! What's more girlie then a little pink tutu? This tutu was really easy to make and requires no sewing. A lot of people use elastic to tie the tull to, however I used a ribbon that ties in the back. All you need for this project is tulling and elastic or ribbon. It was really easy and convenient to buy the 6" spools of tulling, which I found at Hobby Lobby for $4.99 for 25 yards. I have plenty leftover to make another one. All you need to do is cut the tulling to the desired length, (but know that it will actually be tied to only half the total length) and tie it onto the elastic or ribbon with the knots all lined at the bottom.

Wednesday, June 9, 2010

Felt Flower Flip Flops

My sister-in-law Carley is getting married this weekend and I put these flip flops together for the bridesmaids to wear after the ceremony. I made these flowers with felt and used a template I already had cut out from a previous project that I made from the purl bee's site. If you'd like to print out the flower shape template you can find it here. It was originally used for a party garland that is soo cute, check it out at the purl bee. I found a mustard yellow yarn to tie the flip flops together, and also to loop under the flowers. Each set of flip flops has a different button for the center. I used thread to fasten the button, and the yarn to attach the flower to the flip flop.
Tip 
Junkie handmade projects

Thursday, May 20, 2010

Chemise

I was inspired by a chemise I spotted at Anthropologie a while a go and ever since then I have been wanting to create my own. When I found this lace back tank for only $6.00 I thought it would be a good time to try. I bought a large size so that it would fit longer like a dress and added the ruffles to the bottom. I found some silk fabric at Joann Fabric and also bought some fray check that I brushed along the edges after cutting 2, 2inch wide strips. Can't wait to sleep in my new chemise!