Thursday, August 29, 2013
Summer Orzo Salad
Ingredients:
- 1 lb orzo pasta
- 4 carrots, grated
- 2 small cucumbers, chopped
- 1 can of garbanzo beans, rinsed and drained
- 1/2 cup red onion, finely chopped
- 1/4 cup fresh cilantro, chopped
- 1/4 cup fresh parsley, chopped
- 3.5 oz crumbled feta cheese
- 2 avocados, diced
Directions:
Cook the orzo according to the package directions. Drain and let cool. Toss the grated carrots, cucumbers, beans, onion, cilantro, and parsley in a large bowl with the orzo pasta. Pour the dressing over and toss. Refrigerate for 2-3 hours or overnight. Before serving toss the avocado and feta into the pasta salad.
Dressing:
1/2 cup olive oil
3 lemons, juiced
1 lime, juiced
2 garlic cloves, diced
Salt and pepper
Directions:
Combine all of the ingredients in a bowl and whisk together.
Recipe slightly modified from My Colombian Recipes.
Tuesday, August 20, 2013
DIY Car Seat Cooler with FREE Pattern
I am not sure what we would do in the Arizona summers without the kid's car seat coolers! There would probably be a lot more whining and complaining when we got into the car. Instead they ooh and ahh over their nice cold car seats! I used to sell the pattern for these in my Etsy Shop, but I decided to post it here to share with all of you! It takes just a few supplies, basic sewing skills, and a sewing machine.
Wednesday, August 14, 2013
DIY Bath Toy Tub
My boys love playing with lots of small plastic toys in the bathtub, and lately they've had a lot of fun playing in their sinks. The toys are usually left all over the bathroom, and our growing collection no longer fits into the container I once had for them. So I thought I would make them a new home. I used a large plastic tub that was once filled with animal crackers from Costco, a rubber ducky, yellow spray paint, and some chalkboard vinyl. You can follow the steps below to make your own.
You will need:
-Large plastic tub with lid
-Rubber Ducky or other toy to attach to the lid
-Glue
-Spray Paint
-Chalkboard Vinyl or chalkboard spray paint
2. Spray paint the lid and the toy. You will probably need to do 2-3 coats to fully cover the toy.
3. While the lid and toy are drying drill a hole or a few holes in the bottom of the tub to help water drain.
4. Cut the chalkboard vinyl to cover the old label of the plastic tub. I cut two labels using my silhouette machine to cover an old label on the front and the back. You could also cut the vinyl with scissors. Or if you are using chalkboard spray paint, follow along here.
Friday, August 9, 2013
Kitchen Inspiration
We have been in our house for over a month now and it has been nice to feel a little more settled. However, there are still so many projects that need to be finished and begun! When I am feeling overwhelmed by all that needs to be done still, I try and remember where we started! We've come a long way! You can see some before pictures HERE. I am excited to post some up to date pictures, but still want to get some projects finished up before that. So I thought I would post some pictures that have, and still are inspiring our kitchen remodel.
Photo Above:
1.White Open Shelving via Decor Pad
2. Industrial Style Kitchen Cart Via Pinterest
3. Milk Glass Pendant via Restoration Hardware
4. Farmhouse Sink via Ikea
5. Bare Bulb Pendant via Restoration Hardware
6. Kid's Art Display with Ikea Curtain Wires via Pinterest
7. Brass Hardware Bin Label via Wayfair
8. White Carrera Marble Countertops
9. Chrome Latch Hardware via Restoration Hardware
10. White Shaker Cabinets with Grey Island via Pinterest
1. Elton Settee via West Elm
2. Concrete Top Kitchen Table via Restoration Hardware
3. Drum Light via West Elm
4. Metal Tub Chairs via World Market
5. Jasper Rug in Aqua via Crate and Barrel
Wednesday, July 31, 2013
Vegan Cashew Dill Dip
This is a great healthy alternative to a store bought dip. It is easy to throw together and is made with fresh healthy ingredients. One recipe makes about 1 to 1 1/2 cups so you can keep some on hand in the fridge to snack on. Great with fresh veggie or pita chips.
- 1 cup raw unroasted, unsalted cashews
- grapeseed oil (about 1/4 cup or less)
- 1/4 cup warm water
- 1 teaspoon sea salt
- 1 small lemon, juiced
- 2 tablespoons minced fresh dill or 2 teaspoons dried dill weed
- 1 teaspoon mustard
- 2 garlic cloves, minced
- 1/4 cup cold water
Monday, July 22, 2013
Carley's Colorful Book Themed Baby Shower
This last weekend we celebrated my sister-in-law and baby Raelynn with this colorful book themed baby shower. Carley loves to read, and this is their first baby so a book theme seemed perfect. The colors that Carley chose for the nursery are very fun and colorful, so we were able to incorporate those with the shower as well. You can find more details about the shower below.
Free Jane Austen reading print HERE.
Felt balls were purchased on Etsy from Hand Made Only.
I then strung the 2cm sized balls onto twine using a large needle.
Fresh gerber daisy flowers were placed in jars on each table. We found gently used children's books at thrift stores to use as centerpieces.
We used baby links as napkin rings, that were then gifted to the Mommy-to-be.
The napkins and table runners were made with very fun fabrics. Simply cut to squares and large strips and the edges sewn with a serger. 3 yards made 3 table runners and 2 yards made about 24 napkins with some extra scraps leftover.
Fabric from Fabric Bubb.
Make your own tissue poms to add some color to the shower!
Tutorial HERE.
Yogurt Parfaits served with fresh fruit and granola.
If you look closely there is a tiny baby frozen in that ice cube. Fun baby shower game... Freeze tiny babies (found at craft store) in ice cubes. Give each guest one as they arrive. The first guest that gets their baby out of the ice cube must yell "My water broke!" and wins the game.
As prizes for the winners of each game we gave them each one of the Mommy-to-be's favorite books.
Each book was also wrapped with a colorful headband made of jersey knit fabric. Tutorial for headband HERE.
We served Chocolate covered strawberries and chocolate covered bacon as dessert for a morning brunch style shower.
We used striped paper straws, twine, and washi tape to make the pendant banner with baby Raelynn's name on it.
We also used fun colored washi tape to create quick and easy straw flags that were labeled with each guest's name.
We put Rochelle to work doing all the writing! She has beautiful penmanship and we had her address all the invitations, write on drink flags, food labels, and anything else that required pretty writing!
As guests arrived we took their picture with the Mommy-to-be to place in a photo album for her to remember the special day.
Served orange juice, mimosas, and cucumber mint water.
Fabric garland using a variety of colors and prints looks so cute! Carley will also be using it as a decoration in baby Raelynn's nursery.
Served several kinds of quiche and breakfasts braids.
Presented Carley with a letter written to her and baby Raelynn from Matt (Daddy-to-be).
As party favors for each guest as they left we made bookmarks with a reading quote by Jane Austen, along with a tea bag.
It was a very special morning with lots of love for Carley and Baby Raelynn!
Sunday, July 14, 2013
Diaper Cake Tutorial
Today we celebrated My Sister-in-law and baby Raelynn! I can't wait to meet that sweet baby girl and so excited that Piper and her will grow up close in age. I had a lot of fun making this diaper cake for the shower. Can't wait to share more pictures of the shower. It was a book themed shower with lots of fun bright colors. We modeled the colors of the shower after Raelynn's Nursery. You can find a tutorial below on how to make the diaper cake.
You will need:
-Size 1 diapers (i used 78 for the 3 tiered cake)
-twine or ribbon
-cake pans or pots in 3 sizes
To Decorate:
-3 Burp bloths
-Baby headband
-Felt balls (about 50)
-Twine
-Wooden letter
-Yarn
Step 1: Create a line of diapers all going the same direction and evenly spaced.
Step 2: Curl the diapers into the first cake pan, adding more if needed so the pan is full.
Step 3: Tie the diapers tight with twine.
Step 4: Carefully remove the diapers from the pan. Slide twine to center of diapers. If using Pampers it will run right along the yellow line on the diapers. Now you will need to slide the diapers to fill in any larger spaces.
Step 5: Once all of the diapers are evenly space you may have a hole in the center. (shown above)
Step 6: Roll up 1-2 diapers and place inside the hole.
Step 7: Your first layer is done! Repeat Steps 1-6 for the next two layers.
Once your layers are done you can stack them, making sure each layer of diapers is going in the same direction.
To Decorate:
Create a topper by rolling three burp cloths and wrapping a headband around all three. I made the burp cloths using cloth diapers and fabric from Fabric Bubb. You can buy felt balls online in all different colors. I ordered mine on Etsy from Handmadeonly and strung them on twine using a larger needle. For the Letter I wrapped grey yarn around a wooden letter that you can find at a craft store. I used a hot glue gun to hold down the yard in certain spots.
Tuesday, July 9, 2013
Blueberry Plum Crumble
This is such an easy and yummy summer dessert. You also can use different fruit to change it up a bit each time. I altered a recipe from Barefoot Contessa that originally had peaches instead of plums. I've made it with peaches before too, and it is really good. This time I made it with plums because we had lots of plums to use up from our tree.
Ingredients:
10-12 firm, ripe plums
1 cup fresh blueberries
2 tablespoons freshly squeezed lemon juice
1/2 cup sugar
1/4 cup flour
Ingredients for Crumble:
1 cup flour
1/3 cup sugar
1/4 cup light brown sugar
1/2 teaspoon salt
1/4 teaspoon cinnamon
1/2 cup cold unsalted butter, diced
Directions
Preheat the oven to 350 degrees.
Remove the skin from the plums, cut into thick wedges, and place them in a large bowl. Add the lemon juice, sugar, flour, and blueberries. Gently toss. Let the mixture to sit for 5 minutes. Next divide the mixture into ramekins or you could place into a baking dish. (I was able to fill 6 of the ramekins shown above)
For the crumble topping, combine all of the ingredients in a mixing bowl. Use a pastry knife or butter knife to blend the butter into the dry ingredients. You can also use your hands to mix the ingredients until they form into crumbs. Then sprinkle the crumb over the fruit. Place the ramekins or baking dish on a cookie sheet lined with foil. Bake for 35-40 minutes, until the tops are browned and crisp and the juices are bubbly. Serve warm with vanilla ice cream on top!
*Recipe altered from Barefoot Contessa's Peach Blueberry Crumble
Sunday, June 30, 2013
Play Dough Volcano
Hudson made a play dough volcano with baking soda and vinegar at school last week. He wanted to make another one right when he got home! He is really into science experiments like this, and I've had to restock my baking soda and vinegar supply quite a bit lately!
You will need:
-Vinegar
-Red food coloring
-Baking soda
-Funnel
-Small water bottle
-Play dough, recipe here.
-Baking sheet
-aluminum foil
First line your baking sheet with foil.
Then use a funnel to place 3-4 spoonfuls of baking soda in the water bottle.
Next cover your water bottle with play dough.
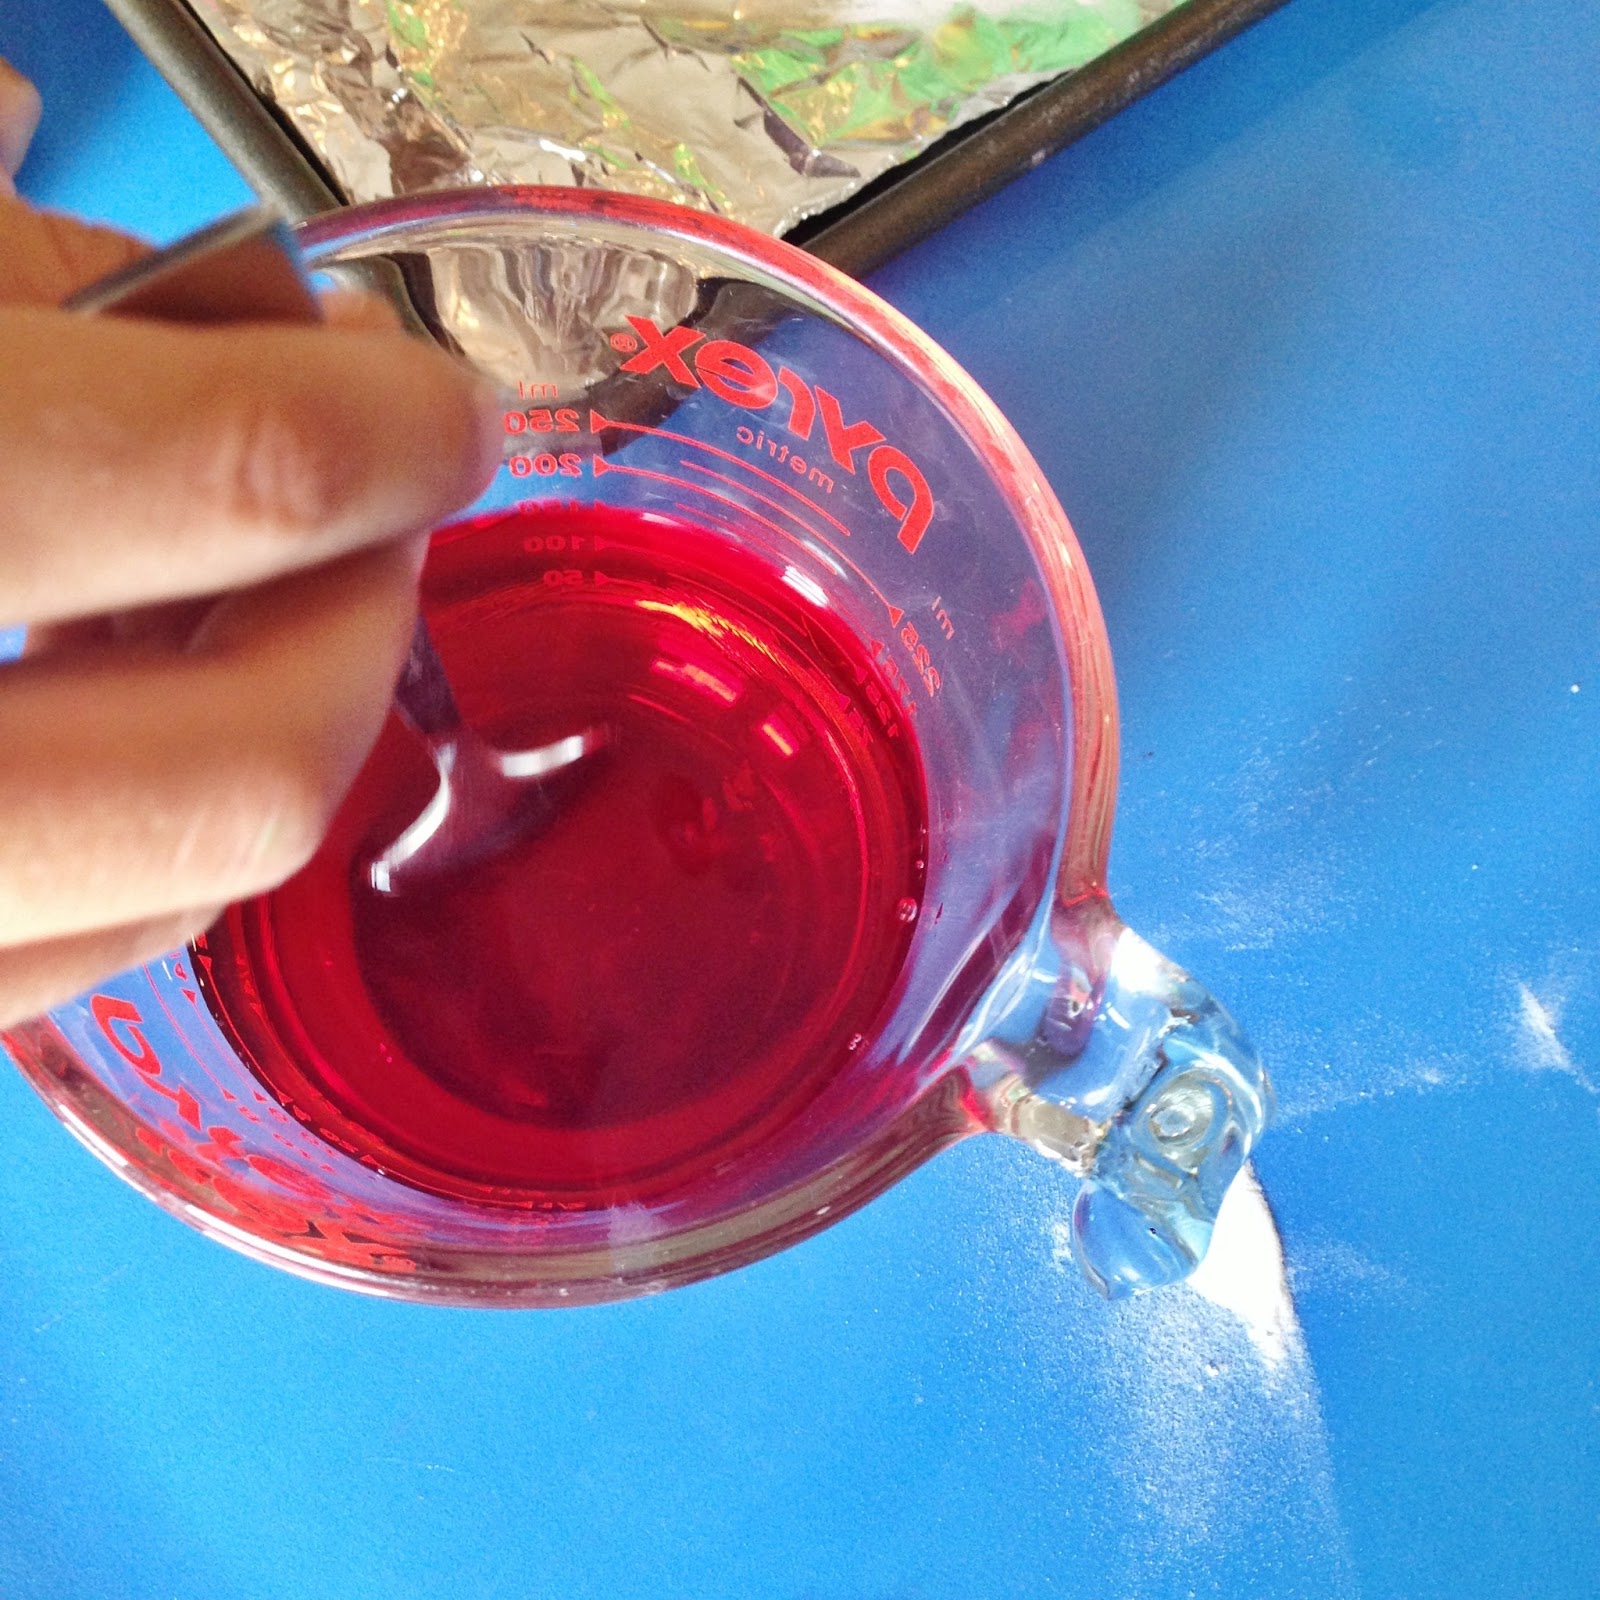
Then mix red food coloring into about 1 cup of vinegar to make the "Red Lava"
Hudson place some small toys around his volcano.
Then pour the vinegar into the volcano.
Watch the volcano erupt!
You should be able to pour the vinegar into the volcano a few times to make it erupt.
Then we added more baking soda to ours to do it a few more times.
Sunday, June 23, 2013
Home Remodel: Before and After Exterior Paint
We weren't originally planning to paint the exterior of the house before moving in, so when we made the last minute decision to have it painted we had 1 day to choose the colors! I quickly began searching colors online and asking friends for any input or suggestions that they could offer. I knew that I wanted to paint the exterior grey, but there are about a billion shades! I found a picture on pinterest, here, that I really loved. I have also always loved pictures of colorful front doors, so we decided to go with a bright and cheery yellow front door! You can't really tell in the before picture above, but the roof was green, so we also painted that as a temporary solution until it is replaced in a few years. We also have future plans to one day get rid of all the rock in the front yard and replace it with grass.
Here you can see that the house originally had a beige block with green accents. We also replaced the front light with a vintage barn pendant from restoration hardware.
BEFORE PAINT
AFTER PAINT
BEFORE PAINT
AFTER PAINT
BEFORE PAINT
AFTER PAINT
We painted the exterior block and walls with Dovetail Gray by Sherwin Williams
We painted the trim White Dove by Benjamin Moore
The front door was painted with the color Daisy by Sherwin Williams,
however he added some white to match the color Lemon Twist (shown above).
Mixing it that way allowed us to get the paint in an exterior quality paint.
The roof was painted black using Behr Masonry and Stucco Paint.
Subscribe to:
Posts (Atom)