Wednesday, June 5, 2013

Seven Great Juicing Recipes

These are some of my favorite juicing recipes that I continue to make over and over. I love to drink my juice cold, served over ice. Makes it taste better to me. It seems like once I start juicing my body begins to crave it everyday. It is a great way to get lots of fruits and veggies in at the start of the day. Especially for the kids! My kids love helping me juice and they also love to drink it. So when my boys are being picky eaters, and only eating peanut butter and jelly sandwiches... I make them a glass of juice and feel much better about what they're consuming for the day!
Hope you enjoy these recipes as much as we do! Some of them I have created on my own and other recipes I have found online and slightly adjusted. For all of the recipes below you will run the ingredient through a juicer, according to the manufacturer's directions. 


Recipe: Serves 1
1 bundle of kale leaves, stems removed
-2 apples, cored and halved
-1/2 pineapple, cored and sliced
-1" ginger, peeled
-1/2 lemon


Recipe: Serves 1-2
-2 oranges, peeled and halved
-2 apples, cored and halved
-2 celery stalks
-2 carrots
-1/2 lemon


 Recipe: Serves 1-2
-1 large golden beet
-2 oranges, peeled and halved
-2 apples, cored and halved
-2 celery stalks
-2 carrots
-1/2" ginger, peeled


Recipe: Serves 1-2
-1 large beet, quartered
-2 carrots
-1 orange, peeled and halved
-1 apple, cored and halved
-2 celery stalks
-1/2" ginger, peeled


Recipe: Serves 1
-1 grapefruit, peeled and quartered
-3 carrots
-1" ginger, peeled


Recipe: Serves 1-2
-2 apples, cored and halved
-2 carrots
-2 celery stalks
-1/2 lemon
-1" ginger, peeled
-5 oz spinach
(Rise and Shine Juice recipe via Giada De Laurentiis)
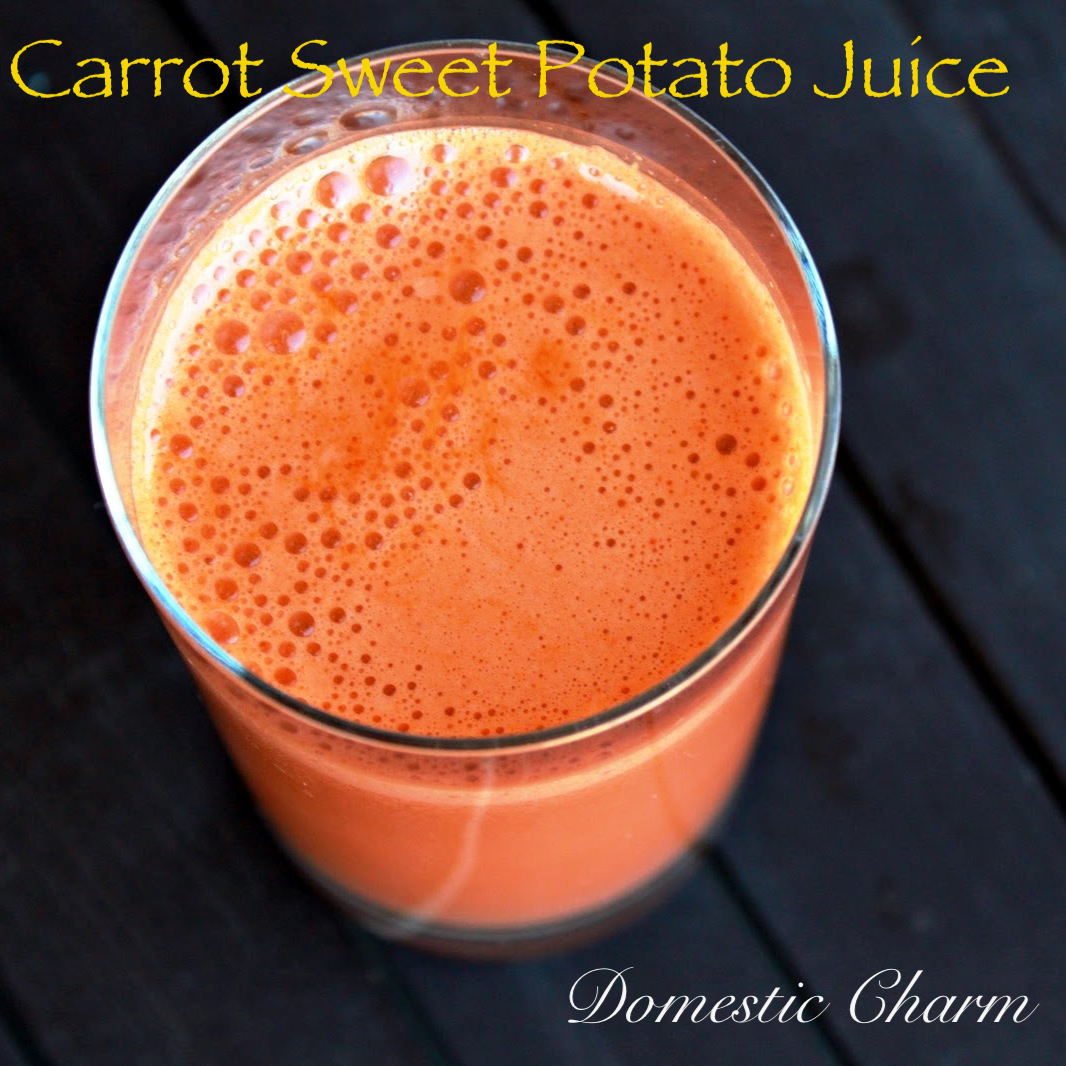

Recipe: Serves 1-2
 -1 sweet potato, quartered
-4 stalks of celery
-5 carrots
-1 apple, cored and halved
-1/2 lemon


Thursday, April 4, 2013

We Bought a House...

We bought a house in February and I have been hesitant to post pictures because I wanted to have some 'after' pictures so everyone didn't think we were absolutely crazy! We have quite the project on our hands, and my VERY hardworking husband has been working all day and night to get this house ready for move-in. There's still so much to do, but SO MUCH progress made as well! This is the front of the house (pictured above), however we are focusing our time and money on the inside first. You will see why as you scroll down! The house was a foreclosure in poor condition and filled with junk! It is a basement home located in downtown Gilbert.

This is the huge side yard that the kids are going to love playing in. The yard has a garden that is already starting to come back... citrus trees, an apple tree, pomegranate tree, a vineyard, and 8 raised garden beds! There's also a chicken coup in the back corner.

This grapevine already has tons of blossoms coming back since I took this picture!

Here are the raised beds...Excited to start gardening!


Now are you ready to see a very dirty house???


Kitchen sink view

Kitchen sink view after demo


 Kitchen sink view
Cabinets are going in now!

This was a large hidden pantry that we removed to open the kitchen up to the family room. 

Kitchen view from where the hidden pantry was.

Family Room view to front door

Family Room view to front door
(Opened up the front room, which will become formal dining, to the family room)

View to family room and front door from the kitchen.
Canned lighting in and dry wall going up.

We have filled 4 dumpsters and are finally coming out of the messy demo stages. 

 My sister and I working in the basement.

 My brother-in-law, Kyle helping paint the basement.

My sister, Wesley removing wallpaper on the ceiling! 

View down hallway to bedrooms.

View down hallway to bedrooms.
New texture on walls, paint, and floors going in now!


Lots of progress happening everyday and we are so very grateful for all the help from our family that has gotten us this far! I will be posting more pictures soon. We are hoping to be moving in by the end of April with most major projects done. 


Monday, March 25, 2013

Peanut Butter Apple Snack


Lately it feels like all my boys want to do is snack! They are constantly coming into the kitchen saying that they're hungry. I have been getting bored with giving them the same few things to snack on, so I thought I would turn to Pinterest. I found a recipe like this by Kids Kubby. I slightly modified it based on what I had on hand. It's a quick, easy, healthy, and fun snack that the kids will love!

Ingredients:

-Apples
-Peanut butter
-Unsweetened coconut flakes
-Dark chocolate chips
-Cinnamon

Directions:

Slice the apple in thin slices as shown above. Then using a small heart shaped cookie cutter, or a pairing knife cut the core of the apple out in a heart shape on half of the slices. On the other halves I removed the core by cutting a smaller hole. Then spread the peanut butter on these halves. Top with coconut flakes and chocolate chips. Then cover each with the slices that have the heart shapes in the center. Sprinkle with cinnamon and enjoy!

This is an easy snack to mix up with your favorite ingredients. Here are some other ideas: 
Almond butter
Honey
Granola
Nutella
Oats
Yogurt
Nuts
Raisins

Wednesday, March 20, 2013

Homemade Tortilla Chips


These are homemade baked tortilla chips that are super easy to make. Great for a party to go with a dip, because you can serve them warm out of the oven! They are light, flaky, and can be seasoned however you'd like.

Ingredients:
-5 raw flour tortillas (i buy mine at Costco, and freeze one pack until ready to use)
-1 tablespoon of olive oil
-Salt

Directions:
Preheat the oven to 350 degrees. Stack your raw tortillas on a cutting board, and using a sharp knife slice them into triangles. Lay a single layer of triangles on a baking sheet. They can overlap slightly. Next drizzle with olive oil and season with salt (or your favorite seasoning). Bake in the oven for 8-10 minutes until bubbling up and golden brown. Repeat with another batch, until all of your tortillas chips are cooked.


Wednesday, March 13, 2013

DIY Water Bombs


Hudson has been asking to play with water all winter long and this week it is in the 90's, so I finally said yes! I looked on Pinterest for some ideas and decided we would make some water bombs. I found a tutorial HERE from House of Hepworths. These are really easy to make and the boys enjoyed helping.

Supplies:
-Basic sponges, in a variety of colors
-Small elastic hair ties
-Scissors


Step 1: cut all the sponges into fouths, lengthwise.
Step 2: Stack the sponges into 2 rows of 4. Hudson liked choosing the colors and creating patterns.
Step 3: Wrap the 2 rows with a small elastic hair tie or you could tie it tight at the center with fishing line.
*You will use 2 sponges to create 1 water bomb.


Water Bomb Game Ideas:

-Create a target with chalk on pavement and toss water bombs.
-Line up different size buckets worth different points and toss bombs into buckets. Keep score.
-Water bomb toss
-Water bomb tag


Monday, February 18, 2013

Albion Fit Giveaway


I recently came into contact with Albion Fit, they sell women's fitness clothing and stylish swimwear. I love my Classic Racerback tank. It has a snug fit that is very flattering and comfortable.
Albion Fit would like to offer a Free Classic Racerback tank (shown below) to one lucky reader!


To enter the giveaway you must first "Like" Albion Fit on Facebook HERE.
Next visit Albion Fit and pin your favorite item onto one of your Pinterest boards.
Leave a comment below, in this blogpost, with the link to your pin.
Giveaway ends Friday, February 22nd, 2013.

Albion Fit is also offering an exclusive promotional code for all of you!
Save $15 on any purchase of $50 or more!
Use code: domesticcharm15
Offer expires 2/25/13

Monday, February 11, 2013

Tilapia with Black Bean Salsa


This is a quick and easy dinner to make. I love cooking tilapia! We eat it for dinner a lot so I always have a bag of fillets from Costco in the freezer. The fillets thaw really fast, so it can make a great last minute dinner. I got this recipe from my mom, she is always thinking up great recipes!

Ingredients:

  • 2 to 4 tilapia fillets
  • 1 can black beans, drained
  • 1 can diced tomatoes
  • 2 cloves of garlic, diced
  • 1 red or orange bell pepper, diced
  • 1 jalapeno diced
  • 2 tablespoons olive oil
  • 4 tablespoons fresh cilantro, chopped
  • seasoning for tilapia

Saute the garlic, bell pepper, and jalapeno in the olive oil until tender. Add the can of tomatoes and the can of black beans. Season the tilapia fillets with either salt and pepper, or I sometimes use the recipe below. Place the fillets in the pan and let it cook in the simmering juices for about 8 to 10 minutes flipping the fillets halfway through. Once the fish is cooked through remove from the heat and add the cilantro.


Emeril's ESSENCE Creole Seasoning (also referred to as Bayou Blast):
  • 2 1/2 tablespoons paprika
  • 2 tablespoons salt
  • 2 tablespoons garlic powder
  • 1 tablespoon black pepper
  • 1 tablespoon onion powder
  • 1 tablespoon cayenne pepper
  • 1 tablespoon dried oregano
  • 1 tablespoon dried thyme
  • Combine all ingredients thoroughly.
  • Yield: 2/3 cup

Tuesday, January 29, 2013

Wesley's Nursing Party


We celebrated my sister Wesley last month as she graduated Nursing School. I am so proud of her and so excited for her to begin her new career. She is going to be an amazing nurse! 


I themed the desserts in the colors mint green and red. I made a variety of nurse themed fondant cupcake toppers. Some with pills, scrubs, band aids, red crosses, and stethoscopes. I topped the mini cupcakes (below) with small red fondant hearts.
The cupcakes were Wesley's favorite; Chocolate Cupcakes with Peanut Butter Cream Cheese Frosting and a Peanut Butter Filling.


We made a Dirty Shirley Punch.


I made heart sugar cookies and frosted them with royal icing designs of heart shaped stethoscopes and EKG patterns. The recipe for the sugar cookies is by Sweetopia, you can find the recipe HERE. It is great for cut out cookies that you plan to frost because the cookies come out nice and smooth.


I placed this nurses prayer on a canvas for my sister to take home.
Found the nurses prayer via Pinterest.


Congratulations Nurse Wesley!!!

Wednesday, January 2, 2013

Salmon with Cucumber Pineapple Salsa


I typically make a mango salsa with salmon, however tonight i had fresh pineapple on hand, so I decided to try something new. I adapted this recipe from one of Martha Stewart's here. Her original recipe looks really good, however I did not have all of the ingredients. I'm also trying to stay away from anything spicy in my diet while breastfeeding and her recipe called for a jalapeno. I added some spice to the salmon instead, using Emeril Lagasse's Essence seasoning. It's easier to control the spiciness this way. 

Ingredients:

  • 2 tablespoons fresh lime juice
  • 1 tablespoon honey
  • 1 tablespoons vegetable oil
  • 1 cucumbers, finely diced
  • 1 cup fresh pineapple, finely diced
  • 2 green onions, thinly sliced
  • Salt and pepper
  • 3-4 salmon fillets
  • Olive oil
  • Essence seasoning
Directions:
In a bowl whisk together the lime juice, honey, and vegetable oil. Add the cucumber, pineapple, and green onion. Stir together and season with salt and pepper.
Place salmon fillets on a baking sheet lined with foil. Drizzle with a few tablespoons of olive oil and sprinkle with the essence seasoning. Broil the salmon in the oven for about 12-15 minutes. Serve over rice or quinoa and top with the salsa.