Showing posts with label kids activities. Show all posts

Tuesday, January 31, 2012

February Preschool Activities


Here are some preschool age activities to do with your kids at home during the month of February. These ideas are sent home each month with Hudson from his preschool. You could put these on a calender or fill a jar with each activity written on paper. Have your child choose an activity from the jar during the week.

  • Help Mom and Dad find out if the groundhog saw his shadow
  • Sing or say the days of the week to Mom and Dad
  • Help with 2 chores around the house today
  • Use crayons to make a rainbow. What colors did you use?
  • Count as high as you can out loud
  • Find the letter Rr in a story you read with Mom or Dad
  • Count how many windows are in your house
  • Practice cutting by making paper hearts
  • Tell each member of your family why you love them
  • Sort skittles by color
  • Make a pattern with stickers
  • Put shaving cream in a bag and practice making shapes
  • Try a new food. Did you like it?
  • Sort a handful of coins
  • Have Mom or Dad make flashcards 1-15. How many do you know?
  • Practice brushing and flossing your teeth
  • Draw a picture of something that starts with the letter T
  • Count how many doors are in your house
  • Practice writing your name
  • See what shapes you can find around the house

Wednesday, January 25, 2012

Growing Grass

 Hudson and I planted grass seed the other day and I never took pictures when we started, but now that the grass is growing I thought I would post some. He gets so excited each morning when he sees how much is has grown, it's really cute! The seed took 3-4 days to start sprouting, but once it started it has not stopped! We used cat grass seed, but you could choose any kind you find. Rye grass seed also grows really fast, about 3-5 days. Here is what you'll need:
  • Grass seed
  • Empty baby food jar
  • Potting soil
  • Water
Have your child fill the jar with potting soil and following the directions for whichever grass seed you're planting, place the seeds in the soil. Place some more soil over top. Water the seeds and place in the sunlight, by a window. Watch and wait for it to grow!

 It was fun to have it planted in the glass jar, because Hudson was able to see all of the roots from the grass growing throughout the soil.

Sunday, January 22, 2012

Cloud Dough

 I made this cloud dough for Hudson to play with and got the recipe from Pre-School Play via I Can Teach My Child. All it is, is a mixture of flour and baby oil! It feels super soft in your hands and sticks together like wet sand would. Hudson pretended to make cupcakes and cakes with his, and I gave him some paper straws to use as pretend candles. I made a batch last week for him to play with outside in his sand table. Today I made a few batches for him to play with inside in a large bin on the floor.

You will need just flour, baby oil, and a container for mixing. I made smaller batches and used this Tupperware that already has the 32oz (4 cup) measuring marked. That made it easy to just fill to the line and add the baby oil.

Mix together:
4 Cups Flour
with
1/2 Cup Baby Oil
(easy to double or make as many batches as you need to fill a play tub)

Stir together until it looks like little crumbs and oil is absorbed. I used a spoon at first, then just mixed it with my hands.

I placed a large plastic bin on top of a vinyl tablecloth on out floor for Hudson to play with the dough in. Some of it made it to the red mat, but it was easy to pour it back into the bin when he was done.

I gave him an old muffin tin, cookie sheet, spoon, play cups, bowls, and some paper straws to use as pretend candles. I think you can make this activity new and different each time by changing out some of the play tools that they use with the dough.

Hudson had fun playing and Max liked feeling the cloud dough too, just had to make sure it didn't go in his mouth. I ended up making 3 or 4 batches of the cloud dough to fill his tub.

I made this label when I made some of the cloud dough as a gift. You can save the image and print onto card stock or I printed it onto labels. I put one on a gift tag and tied to a mason jar. Then I used another label to place on Hudson's Tupperware of cloud dough. Would be cute to use as a tag for party favors too. You can add the child's name onto one of the clouds.


Saturday, November 5, 2011

Turkey Craft


This is another activity that Hudson was sent home from preschool with, but it would be easy to create at home with your kids. He was given the turkey template (which you can draw your own or find one online) and told to disguise Tom Turkey so he is not caught on Thanksgiving Day. You can get creative and use things around your house to disguise him. You could disguise him as anything your child would like, such as another animal. Hudson of course wanted to make him a Superhero!

We used markers, felt, glitter, scissors, and glue to disguise Tom Turkey.

First Hudson colored him with the markers.

While Hudson colored I cut out a mask, cape, boots, and superhero emblems to disguise Tom with.

Once Tom was colored we cut him out and then Hudson glued the felt superhero costume onto Tom.

We went back and also added glitter and Hudson made him some wrist bands too. :)

Wednesday, November 2, 2011

November Preschool Activities


Hudson started preschool this year and this month he was sent home with simple "homework" activities to do at home each day. Most of the activities are to reinforce what he is learning at school. I really like having a calendar of simple and new things to do with him each day. I thought I would share some of them with you to use at home with your little ones!
  1. Use play dough to practice making your name
  2. Take a walk to the park and find things that start with the letter "h" (or any letter that they are learning about)
  3. Practice counting to 20
  4. Help Mom and Dad make flashcards 1-20. Practice recognition.
  5. Help set the table for dinner.
  6. Grab a handful of beans and estimate how many you have.
  7. Sort a group of toys by color.
  8. Give your child 1" strips of paper to cut into squares
  9. Let your child place a food item in the food bank at the grocery store.
  10. Show Mom and Dad your zoo phonics sounds and signals
  11. Practice writing the letter "Jj" in shaving cream (or any letter that they are learning about)
  12. Mix some Pumpkin Pie filling with ice cream to make Pumpkin Shakes.
  13. Use play dough to make a pretend dinner.
  14. Draw a picture of something you are thankful for.
  15. Have your child tell you one things they did well today.
  16. Practice writing your name.
  17. Do a puzzle together.
I would love to hear any other fun and simple activities to do this month, you can leave any ideas in a comment below! :)


Sunday, October 16, 2011

Five Fun Bath Time Activities for Kids

 Bubble Bath Paint via Meet the Dubiens

 Colored Ice Cubes in the Tub via Mommy Savers

 Bath Tub Fishing for Letters via Pigtails and Tutus

Glow Sticks in the tub via Pinterest

Submersible lights and Color tablets via Play at Home Mom

I LOVE all of these creative bath time activities for kids. They are all inexpensive to do. I put Hudson is the tub to play when I need to clean the bathroom, get ready, put away laundry, ect. So I will be trying out these fun new ideas to keep him entertained!

Thursday, June 23, 2011

Finger Paint Birthday Banner

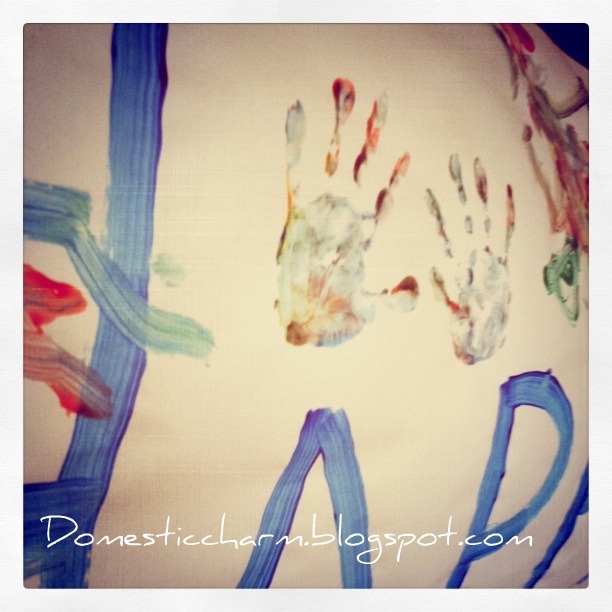
Hudson and I made this birthday banner for Casey today. Since it was so hot outside we painted it inside on the floor and used brushes, then he put his hand prints all over it at the end. We used store bought finger paint, but here is a recipe for homemade. We used paper from a paper roll that they sell at Ikea, which was perfect for making a banner! Hudson had a lot of fun doing this, and it is more fun then having him just color a card. We even put Max's hand print on the banner :)
Tip 
Junkie handmade projects

Friday, June 10, 2011

DIY Moon Sand


Hudson got some Moon Sand for his birthday this year and loves playing with it. When I mentioned this to my sister and she told me that you can make it yourself from just a few ingredients. So I found this recipe online from Irresistible Ideas, Play Based Learning. I used blue playsand that I bought at Walmart and mixed it all up in a plastic bin. You can add more water as it drys out, just be careful not to add too much or it will become soupy. Hudson ended up adding more water to his and liked playing with it when it was really wet too, it just won't stick together and stay together. We also got out some old cake pans and muffin tins for him to play with it in.
Mix together:
4 cups sand
2 cups cornstarch
1 cup of water


Linking up Here!

Saturday, June 4, 2011

Homemade Puffy Paint

Found this wonderful recipe at Sandy Toes and Popsicles. I've been trying to find lots of new and fun activities to do with Hudson. Especially now that it is getting really hot outside. It seems like we always do the same things; so I am trying to mix it up a bit! He loved painting with all of these fun colors and thought it was pretty cool how they puffed up. We started by painting on paper, but moved onto cardboard because it really works better. We just cut the flaps off of an empty diaper box. We used the neon food coloring that you can find in the grocery store, along with some other cake decorating food colors. They made fun and bright colors! We used 6 tablespoons of the flour and the salt and separated it into an old muffin tin tray, then mixed in the colors. This makes enough for about 4-7 kids to paint with, depending on how much paint they use. However, it does puff up better if you apply it on thick.


Ingredients:
1 Tablespoon self-rising floor
1 Tablespoon salt
Food coloring
Enough water to make a paste

Directions:
Mix the flour, salt, and water together until you have a thick paste. Next separate some of the paste into different dishes or an old muffin tin works great. Then add your food coloring. You can use paint brushes or cotton swabs to paint on cardboard. Make sure you brush the paint on thick so that it will puff up when you're done. Once you are finished painting place the cardboard picture in the microwave for 5-10 seconds.

 
Tip 
Junkie handmade projects 

Thursday, June 2, 2011

Milk Art

This is such a clever idea, and an activity that doesn't require buying something at the store. Most people have milk and food coloring on hand. Found this idea over at Sandy Toes and Popsicles. 
All you need is:
• milk
• a toothpick
• plate or shallow dish
• liquid food coloring drops
We used coconut milk to make ours, but i think by using different milk it can make the colors come out looking different. You could try a heavy cream or a low fat milk. Just add drops of the food coloring and swirl the food coloring around slowly. It is kind of mesmerizing to watch the colors float around in the milk! Hudson and I both enjoyed this craft! :)