Sunday, June 19, 2011

Grilled Shrimp with Cabbage Slaw

Ingredients:
  • 2 lbs shrimp, or less depending on the size
  • 1/4 cup olive oil, plus more for asparagus
  • salt and pepper
  •  1/2 head of cabbage
  • 1 avocado
  • 1/2 bundle of asparagus
Dressing:
  • 1/2 cup canola oil
  • 1/2 cup fresh orange juice
  • 1/4 cup fresh lime juice
  • 1/2 cup red onion, chopped
  • 2 cloves garlic, finely chopped
  • 1/4 cup fresh basil leaves
  • 2 tablespoons fresh cilantro, chopped
  • 1 tablespoon honey
  • salt and pepper
 To prepare the dressing, combine all of the ingredients in a blender or food processor. Blend until smooth. Set aside. Place thawed shrimp onto skewers then into a shallow dish with the olive oil and season with salt and pepper. Cover and place in refrigerator until ready to grill. Trim the ends of the asparagus and place in a Ziploc baggie, drizzle with olive oil and season with salt and pepper. Place in the refrigerator. Next wash and dry the cabbage. Slice the cabbage very thin, so that it is shredded into thin pieces. Place in a bowl and set aside. Slice the avocado and set aside.

Prepare grill and heat to medium high heat. Place asparagus and shrimp skewers on the grill. Cook the shrimp for about 2 minutes on each side or until pink. Grill the asparagus for about 4-5 minutes; cooking time varies depending on the thickness of the asparagus. Toss the cabbage with some of the dressing; you will have some leftover. Place the cabbage on each plate, top with asparagus, avocado, shrimp, and drizzle some extra dressing on top.

The dressing for the cabbage is so yummy! Very fresh tasting, perfect for a summer dish. It is from Bobby Flay's cook book Boy Gets Grill. He serves the dressing with a slaw on shrimp taquitos. We left out the tortillas and added avocado to ours. It was really good! Serves 2-3 people.


Tuesday, June 14, 2011

Cobb Salad

We've been eating a lot of salad lately and I was wanting to make one that would be a little more filling, so we could eat it as a meal. I had never made a Cobb Salad before, but really liked how this one turned out. The homemade blue cheese dressing is by Emeril and I like that it is a lighter dressing then a typical creamy blue cheese dressing. This recipe can also be easily doubled to feed more people.

Ingredients:
  • 1 head of bibb lettuce, washed, patted dry, and chopped.
  • 1 avocado, sliced
  • 1/2 cup cherry tomatoes, halved
  • 3 eggs, hard boiled and sliced
  • 5 strips of bacon, well cooked and crumbled
  • 1 chicken breast, grilled and shredded (or sometimes I use a cooked rotisserie chicken from the grocery store, about 3/4 cup shredded chicken)
Dressing:
  • 1/4 cup olive oil
  • 1/2 a lemon, juiced
  • 1/4 lb blue cheese
  • salt and pepper
Mix the olive oil and lemon juice together, whisk in the blue cheese. Season with salt and pepper. Refrigerate until ready to use. Place the lettuce in a large bowl or on each plate. Top with the remaining ingredients. Mix the dressing well, pour over the salad and toss. 

Monday, June 13, 2011

DIY Resin Flowers

So I have seen these resin flowers on lots of earrings and hair clips; however I had no idea how you could make them. I found a great tutorial over at Ris C Handmade. It looks like you can buy the molds for around $5.00 to $8.00 at Mold Muse on Etsy. Not sure what the other supplies cost, but you can find all the details and a full tutorial here.

Sunday, June 12, 2011

Strawberry Spinach Salad

This is a great Summer salad because it is loaded with fresh berries and has a fresh lemon poppy seed dressing. If you wanted to serve it as an entree you could top it with grilled chicken breast.

Ingredients:

Dressing:
  • 2 tablespoons lemon juice
  • 1 tablespoon white wine vinegar
  • 1/4 cup superfine sugar
  • 1 tablespoon vegetable oil
  • 1 teaspoon poppy seeds
Salad:
  • 6 oz package baby spinach
  • 1/4 cup sliced almonds, toasted
  • 8 oz strawberries, sliced
  • 1/2  cup blueberries
  • 1/2 cup raspberries
  • 1/2 small red onion, sliced thin
  • 1/2 medium cucumber, sliced
Combine all of the ingredients for the dressing and mix well. Cover and refrigerate until needed. Place all of the ingredients for the salad in a large bowl. Pour the dressing over top, toss and serve. Serves about 8.


Cupcake Fondue


This is a really cute idea! I found it on Pizzazzerie, and it is created by Amanda Krueger of Bake it Pretty. You can find the recipe and all the details here. This would be really fun for a little girls birthday party!

Friday, June 10, 2011

Peanut Butter Pie

Our family is a bit crazy about peanut butter, so this pie is made quite often. I actually can't believe that I haven't posted the recipe for this yet! If you like peanut butter you are going to want to try this one out! It has an Oreo crust, peanut butter pie, topped with cool whip. Yummy!!!

Ingredients:
  • Double stuffed oreos
  • 1/2 cup peanut butter
  • 8 oz cream cheese, softened
  • 1 can sweetened condensed milk
  • 1/2 cup cool whip, plus more for on top when serving
Place about 4 cups of oreos into a food processor and pulse until you have fine crumbs. You won't need to use the whole package of oreos, but if you want a thicker oreo crust you can add more. Using the double stuffed oreos will help the oreos stick together better to form the crust. Pour the crumbs into the pie pan and press them until firm. Make sure to press the crumbs about one inch up the sides of the pie pan also. Places the pie crust in the freezer to set. Next beat the peanut butter, cream cheese, condensed milk, and cool whip until smooth. Pour into the pie crust and place back into the freezer for about 2-3 hours to set. Remove the pie from the freezer about 10-20 minutes before serving to allow the pie to soften slightly. Top with cool whip and serve!

DIY Moon Sand


Hudson got some Moon Sand for his birthday this year and loves playing with it. When I mentioned this to my sister and she told me that you can make it yourself from just a few ingredients. So I found this recipe online from Irresistible Ideas, Play Based Learning. I used blue playsand that I bought at Walmart and mixed it all up in a plastic bin. You can add more water as it drys out, just be careful not to add too much or it will become soupy. Hudson ended up adding more water to his and liked playing with it when it was really wet too, it just won't stick together and stay together. We also got out some old cake pans and muffin tins for him to play with it in.
Mix together:
4 cups sand
2 cups cornstarch
1 cup of water


Linking up Here!

Thursday, June 9, 2011

Burlap Garland

Found this wonderful burlap garland at Ucreate Parties by WhipperBerry. You can find the full tutorial here. I love this picture and also the doilies hanging below the burlap garland is a very cute idea!

Saturday, June 4, 2011

Homemade Puffy Paint

Found this wonderful recipe at Sandy Toes and Popsicles. I've been trying to find lots of new and fun activities to do with Hudson. Especially now that it is getting really hot outside. It seems like we always do the same things; so I am trying to mix it up a bit! He loved painting with all of these fun colors and thought it was pretty cool how they puffed up. We started by painting on paper, but moved onto cardboard because it really works better. We just cut the flaps off of an empty diaper box. We used the neon food coloring that you can find in the grocery store, along with some other cake decorating food colors. They made fun and bright colors! We used 6 tablespoons of the flour and the salt and separated it into an old muffin tin tray, then mixed in the colors. This makes enough for about 4-7 kids to paint with, depending on how much paint they use. However, it does puff up better if you apply it on thick.


Ingredients:
1 Tablespoon self-rising floor
1 Tablespoon salt
Food coloring
Enough water to make a paste

Directions:
Mix the flour, salt, and water together until you have a thick paste. Next separate some of the paste into different dishes or an old muffin tin works great. Then add your food coloring. You can use paint brushes or cotton swabs to paint on cardboard. Make sure you brush the paint on thick so that it will puff up when you're done. Once you are finished painting place the cardboard picture in the microwave for 5-10 seconds.

 
Tip 
Junkie handmade projects 

Friday, June 3, 2011

DIY Ring Bearer Pillow

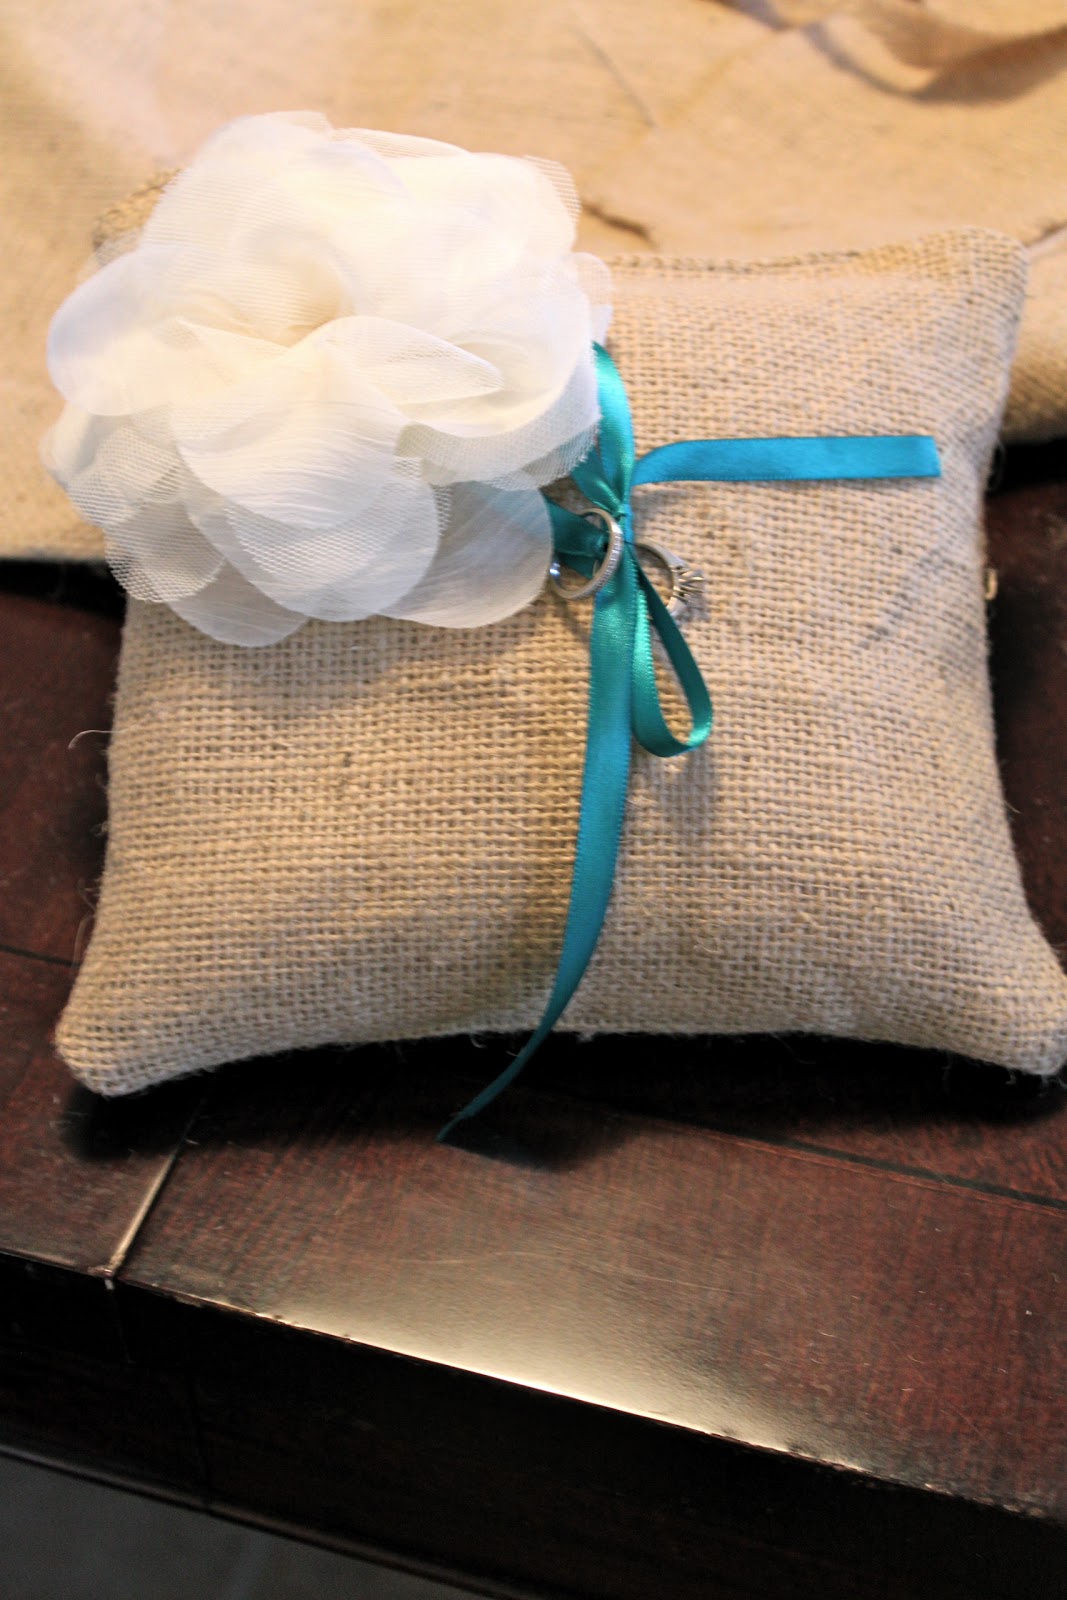
My sister is getting married in January and had the idea of making the ring bearer pillow out of burlap. She bought the fabric flower that we attached to the pillow on sale at Francesca's Collections. This was a really easy and inexpensive wedding project and didn't take us long to put together.
First cut two squares from the burlap, ours were about 6"x6" squares.
 Next pin together the squares with the right sides facing in, however with the burlap it probably won't make a difference which way you face the fabric. Sew along the edge leaving an opening in one side to fill with batting.

Turn the pillow right side out and fill with the batting. Next pin the opening closed and then sew along the edge.
Next we cut a piece of ribbon that is long enough to tie a bow with the rings on it. We found the center of the ribbon and clipped it onto the back of the flower. The flower also has a pin on the back, which we used to attach it to the pillow. If you are making your own flower without a clip and a pin you will want to attach the ribbon to the back of the flower and then to one side of the burlap before you pin both squares of the burlap together. You can easily attach the flower and ribbon by hand sewing it onto the burlap.


Thursday, June 2, 2011

Milk Art

This is such a clever idea, and an activity that doesn't require buying something at the store. Most people have milk and food coloring on hand. Found this idea over at Sandy Toes and Popsicles
All you need is:
milk
a toothpick
plate or shallow dish
liquid food coloring drops
We used coconut milk to make ours, but i think by using different milk it can make the colors come out looking different. You could try a heavy cream or a low fat milk. Just add drops of the food coloring and swirl the food coloring around slowly. It is kind of mesmerizing to watch the colors float around in the milk! Hudson and I both enjoyed this craft! :)


Kids Pizza Party

This kids pizza party is by Real Simple and they have a couple other cute party theme ideas on their site. I think this is a cute idea for a simple, budget friendly kids party. They gave some great ideas for decorations, food, and games that are listed below.
Decorations:
To create a café vibe, cover tables with checkered tablecloths ($15 for 12 disposable 52-by-90-inch cloths, orientaltrading.com) and string white holiday lights and a red-, green-, and white-striped garland ($2.50 for a 12-foot garland, theitalianamerican connection.com) around the room. (If you have leftover Christmas supplies, such as paper streamers, utensils, and the like, they’ll work well with this red-and-green color palette.) For place mats, make color copies of the Italian flag (click the "Little Italy Place Mat" icon at realsimple.com) or a map of Italy. Let kids channel the Super Mario Brothers with stick-on paper mustaches (click the "Stick-On Mustaches" icon at realsimple.com).

Food:
Set up a make-your-own-pizza station, where guests can create their own edible masterpieces, featuring pepperoni smiley faces or hair made of Cheddar cheese. Each child receives his own prebaked mini pie, made with store-bought refrigerated dough, and chooses from a selection of toppings. Time for dessert? Serve individual scoops of gelato or ice cream in paper cups and allow kids to garnish with various toppings, like red and green sprinkles.

Games:
Pin the pepperoni on the pizza. Download the game board by visiting Realsimple.com, or create your own version using felt or poster board. The kids, blindfolded, get five points for pinning the pepperoni on the center of the pizza, two points for placing it directly on a slice without touching a line, and one point for hitting the crust. 
Hot Tomato. Just like Hot Potato, but with a tomato. 
Meatball race. Kids form teams and deliver a “meatball” (a golf ball or a racquetball) on a spoon to a designated location and back without dropping it. 
Bocce ball. Each player gets a ball (or a beanbag). One person throws a starter ball roughly eight feet ahead, then each child tries to throw his ball as close to the first ball as possible. The closest wins.

Wednesday, June 1, 2011

Lemon Vinaigrette

This Lemon Vinaigrette recipe is by Martha Stewart, you can find it here. This is a great simple recipe for summer. You can use it on most salads or even as a marinade for Chicken breasts. 

Ingredients:
  • 1 teaspoon Dijon mustard
  • 1 1/2 teaspoons finely grated lemon zest
  • 2 tablespoons plus 1 1/2 teaspoons freshly squeezed lemon juice
  • Coarse salt and freshly ground pepper
  • 6 tablespoons extra-virgin olive oil
Directions:
  1. Combine mustard, lemon zest, and juice in a jar; season with salt and pepper. Add some of the oil, then cover and shake to combine. Continue adding more oil and shaking until all the oil is incorporated and mixture is thickened and uniform in color. Serve immediately.

Creative Father's Day Ideas

Father's Day Grill Cupcakes, recipe here.

Father's Day Personalized Soft Pretzels, recipe here.

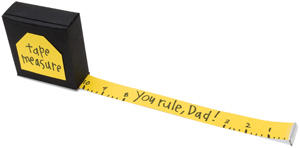
Father's Day Tape Measure Card, tutorial here.

All of these recipes and ideas are from Disney's Familyfun.go.com and you can find more Father's Day ideas from them here.

Homemade Bubbles


Hudson and I made some homemade bubbles today. Not sure about all of your kids, but Hudson seems to go through the bubbles pretty quickly. Usually he spills them or pours them out; so I like the idea of making them from this easy recipe instead of buying them. The recipe we used works great, however I know there are probably better recipes out there. We just followed this one because we had all the ingredients in the house already. All you do is mix together 1 cup of water, 4 tablespoons of dish soap, and 2 tablespoons of light karo syrup. I also added a few drops of blue food coloring. It didn't seem to do anything to the bubbles, but Hudson liked that the solution was a fun color. I found the recipe here on About.com. They have a few other recipes for bubbles on that page that would be fun to try sometime. They also have a great page that shows you lots of ideas for making your own bubble wands here.