Showing posts with label pink. Show all posts

Sunday, January 19, 2014

DIY Lit Floral Centerpiece


Here is a really pretty and simple to make floral centerpiece idea. I put these together for an evening baby shower, however they would be great for any occasion! The led lights inside of the mercury glass create a beautiful glow. Follow the detailed steps below to create your own!

First mix together your flower food with 1 quart of water. You will want to use a container with a pouring spout.

Pour water about halfway up each water tube. Place lid back onto the water tube and stick 2-3 different florals in each tube.

Place your battery powered led light strands in each of your vases. 
I found mine at Target on clearance for under $5 each.

Begin placing your florals in the vase, arranging them to create a balanced centerpiece. You may need to go back and trim different stems shorter once your have all of the flowers in place. I also used fake succulents to help fill the vase. I found mine on Save-on-crafts.com. 


Monday, November 18, 2013

Amy's Fall Themed Baby Shower

This weekend I worked with a few friends to throw our friend Amy a baby shower. She is expecting her second little girl, Autumn anytime now! Amy is due with Autumn on Thanksgiving, so we thought a Fall themed shower would be perfect! We had the shower outside and the weather was beautiful! We served soups and salad for lunch and pies for dessert. As favors everyone took home a homemade pear butter. You can read and see more details below!


Monday, November 11, 2013

Piper's 1st Birthday

 Can't believe our sweet baby girl is already ONE! The year has flown by, and I think I say that every year when the kids have a birthday. We were planning to have a small dinner party for Piper's birthday with family and close friends. However, the plans changed when Hudson came down with the stomach flu that morning. It was a bummer we didn't get to celebrate with friends and family, and eat all of the food that had been bought and prepared. However, Piper didn't know the difference! I did still take some pictures that I wanted to share. It was fun to plan a party with pink this year! 


 I made mini carrot cake cupcakes and a pink ruffled cake. You can find a tutorial for the pink ruffled cake HERE. I used striped paper straws and yellow tissue paper to make little candles for each cupcake. Also perfect for the birthday girl's cake!

 Made a yummy apple cider sangria, recipe HERE.
Perfect adult drink for a Fall party!

We went with the "mini" theme for her 1st birthday.
These mini crab apples were perfect! Found them at Fry's.
We also made mini meatball sandwiches for dinner.

 Put together a large veggie bowl full of "mini" cucumbers, peppers, carrots, and tomatoes.
I filled the bottom of the bowl with grocery bags and paper towels to keep the veggies up higher in the bowl. I was inspired by the veggie bowl served at True Food!

For the centerpieces I decorated with gold mason jars, pink and peach florals, white and gold pumpkins, and succulents.


I bought the sweet handmade crown for Piper to wear on Etsy from Tilly Tilda.

 Made this tissue paper tassel garland. You can find a tutorial HERE.

I bought some pretty tissue poms from Petite Party Studio in down town Gilbert. I plan on reusing these by hanging them in Piper's room.

For party favors I made homemade play dough (recipe HERE) in three colors. I placed three rolled balls of each color in small mason jars and sprinkled with gold glitter. I used a free printable from Tomkat Studio, HERE.

Happy 1st Birthday sweet Piper!

Sunday, October 23, 2011

New Paper Straw Colors


 Red Hearts


Lots of fun new colors to choose from in my shop! There are now 19 different styles and colors. I would also love to hear from you; what color and design would you like to see in my shop?

Thursday, October 20, 2011

French Macarons

 I have been wanting to make some french macarons for quite a while now, and today I finally got around to making some! I plan on making some for my sister's wedding and wanted to have a trial run before the big day. I think I will experiment more with some homemade fillings, but these that I made today were very simple and easy to make! I combined a couple recipes to create this one. 
The main recipe I followed was by Martha Stewart here. I love the muted colors of her macarons, however I decided to make mine a bit more colorful!

Ingredients for Macarons:
  • 1 cup confectioners' sugar
  • 3/4 cup almond flour
  • 2 large egg whites, room temperature
  • Pinch of cream of tartar
  • 1/4 cup superfine sugar
  • 1/2 teaspoon vanilla extract
  • 1/2 teaspoon lemon extract
  • 1/2 teaspoon strawberry or raspberry extract
  • Teal food coloring
  • Yellow food coloring
  • Pink and Burgundy food coloring (i added burgundy to help make a brighter and darker pink)
Ingredients for fillings:
(use about 1 teaspoon of filling for each macaron)

  • Lemon curd
  • Strawberry or raspberry preserves
  • Nutella

Directions are listed at the bottom of post.


Tuesday, September 27, 2011

Cupcake Cake Pops

 I have seen lots of these cupcake cake pops online, but this was my first time making them. They weren't any harder then making regular cake pops, just required a couple extra steps. I think they were originally done by Bakerella here. To make them a little bit more fun I used striped paper straws instead of lollipop sticks. You can follow the steps below to learn how to make them.

Monday, September 5, 2011

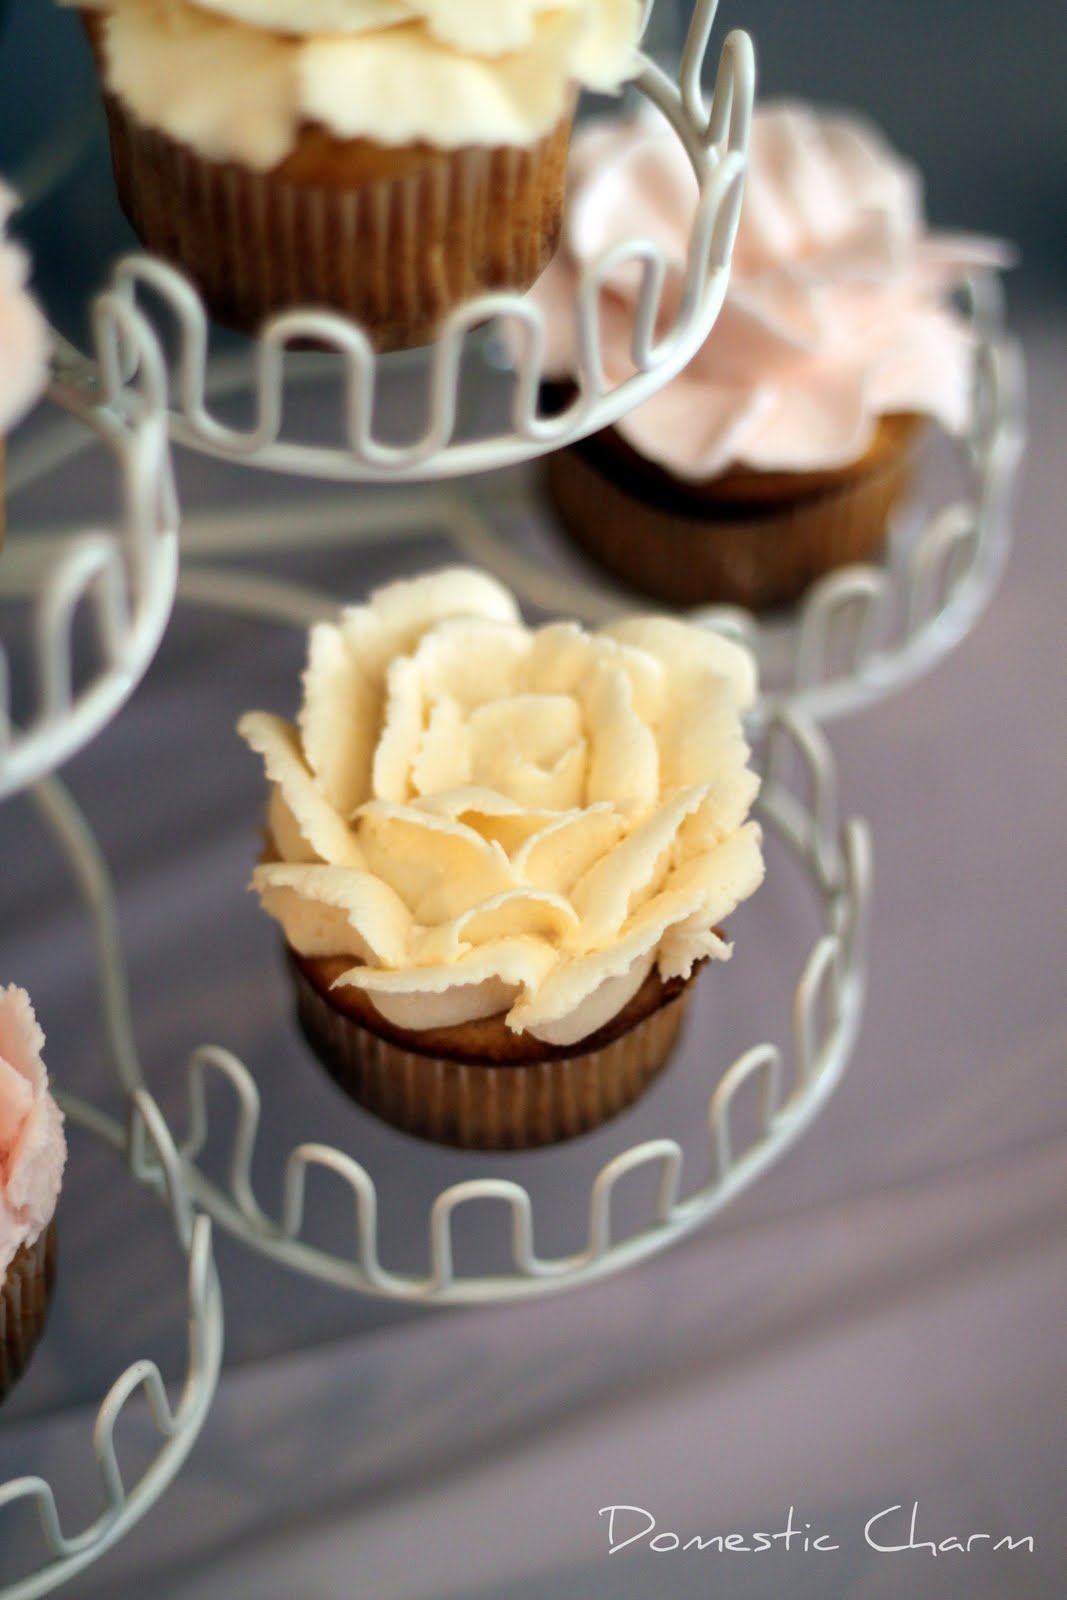
Buttercream Flower Cupcakes


I also made these cupcake for Payton's 1st Birthday party. Amy had found the inspiration on Pinterest here, and I just did my best to make them look like the picture!
I used a large petal tip to decorate them, tip #127 with butter cream frosting. I colored half of my frosting a pale pink and the other half ivory. To create the rose flower you start at the center of the cupcake and hold the tip straight up and down, with the thicker edge of the tip pointed down. It helped me to hold the cupcake in one hand and the frosting bag in the other. For the first petal you circle it around to make just a small opening at the center, like a real rose would look at the center. Then you begin to add petals around, by tilting the tip out the petals will form a more opened looking rose and vice versa.
The other flower is formed by holding the same tip flat (horizontally) against the cupcake top with the thin edge of the tip facing out. You pipe about 6 or 7 petals around the outer edge, then 4 on top of those in the center. I have included the buttercream frosting recipe below. You use a lot of frosting to frost these cupcakes, I made 24 cupcakes and used almost all of the frosting that I made from the recipe below.

Buttercream Frosting:
  • 1 cup butter (2 sticks), softened
  • 1 cup solid white vegetable shortening
  • 2 teaspoons vanilla extract
  • 4 tablespoons heavy cream or milk
  • 2 lbs confectioners' sugar, sifted (about 8 cups)
Using a stand mixer with the paddle attachment cream together the butter, shortening, vanilla, and heavy cream until smooth. Add the sifted confectioners' sugar about 1 to 2 cups at a time. Scraping down the sides of the bowl as needed. Once all of the sugar is added mix at medium high speed for 1 to 2 minutes. If the frosting seems too stiff add more heavy cream 1/2 tablespoon at a time, it will thin out very easily. However, you will want this frosting to be stiff for piping the flowers onto the cupcakes.

Linking up HERE!