Sunday, September 18, 2011

DIY Kids Halloween Costume Ideas


Some great Halloween costume ideas from over at Disney's Family Fun site. These are just a few from their large selection of creative DIY Halloween costumes for kids of all ages. They also provide detailed instructions on how to make each costume, including a material list. Click the links below each picture to see how to make each one.
I am not positive what Hudson and Max are going to be yet this year. Hudson keeps changing his mind...but I am thinking he is going to end up being Buzz Lightyear. Nothing very creative, but it's his favorite! :)

Thursday, September 15, 2011

Superhero Cake

So I realize that I made this cake for Hudson back in April, but I have been making some Superhero cupcake toppers lately and it took me back to this cake. I don't think I ever posted some of these pictures of it, so I thought I would now. I made the superhero topper from fondant and it is being held up with toothpicks that dried inside of the legs. Maybe one day soon I will post a full tutorial on how to make one! I think I might also start selling the Superhero cake topper in my Etsy shop for those who would rather just buy one and not make it. :) It was a fun day, can't believe it has already been almost 6 months since then! Love that kid!

Pictures by Melissa Young Photography

Tuesday, September 13, 2011

Dresser Revamp

So here she is...my first chalk paint project! I am really happy with how the dresser turned out, and loved using the chalk paint. I painted the dresser with the Paris Grey chalk paint and then painted the hardware with the old white. I distressed the dresser on some of the edges and used a clear wax to seal it. I love all of the little details of the dressers drawers and edging along the bottom! Now that I finished it I am kind of tempted to keep it...but I don't really have a place for it. So... the dresser will be available for purchase this weekend at the Vintage Market in Scottsdale!

Halloween Bat Craft

 I made this Halloween Bat this morning with Hudson. It is made from a recycled egg carton. I found the idea on Pinterest here via Enchanted Learning. I know Halloween is still over a month away, but I am kind of over Summer and ready for Fall! Hudson also keeps telling me "I am SO excited for Halloween!!!"...So I thought we would make something "Halloweenish" today since he has a bit of a wait ahead of him! You will need:
-Egg carton
-Ribbon
-Glue

Here is how we made ours:

 Start with an empty egg carton and cut the top and sides off so it looks like this.

Each egg carton can make 4 bats, so cut the carton into sections like this. You will need to trim the backs down so that it can sit flat.

Next cut out  each side to make the bats wings. Then spray paint each bat black.

 Now that the bat has dried you child can help with this part. Have you child place glue on the backs of the eyes and place them onto the bats face.

 Make a small hole in the top of the bat's head and have your child push the ribbon through the hole. Tie a couple knots to keep the ribbon from pulling through. And you're done! Now you can hang the bat somewhere in the house as a Halloween decoration. 


Saturday, September 10, 2011

Superhero Cupcake Toppers


Superhero cupcake toppers are now available in my Etsy shop. The toppers are made from fondant and gumpaste. They can be used to top cupcakes or cookies. These are made to order, so I can customize the colors to match your party. Also available in my shop are coordinating cupcake wrappers, superhero capes, and other party supplies! All perfect to complete your superhero party!

Thursday, September 8, 2011

Cookie Cutter Jar

As I am still working on organizing my craft room, I had to find a place for all of my cookie cutters. I have lots that are the same shape, just different sizes. Many of them are really small so I didn't want to just throw them all loose in a big jar. Then I remembered I had a bunch of these silver hinged rings that I could finally put to good use! I looped all of the coordinating cookie cutters onto the rings and tossed them into the jar. Now I don't have to go digging to find all of the heart cookie cutters when I need them. I love this picture that I came across over at Originally Me via Pinterest, with cupcake liners stored in a big glass jar. I still might need to do something like that, I love how all of the colors look. But for now I needed a place for my cookie cutters.

Monday, September 5, 2011

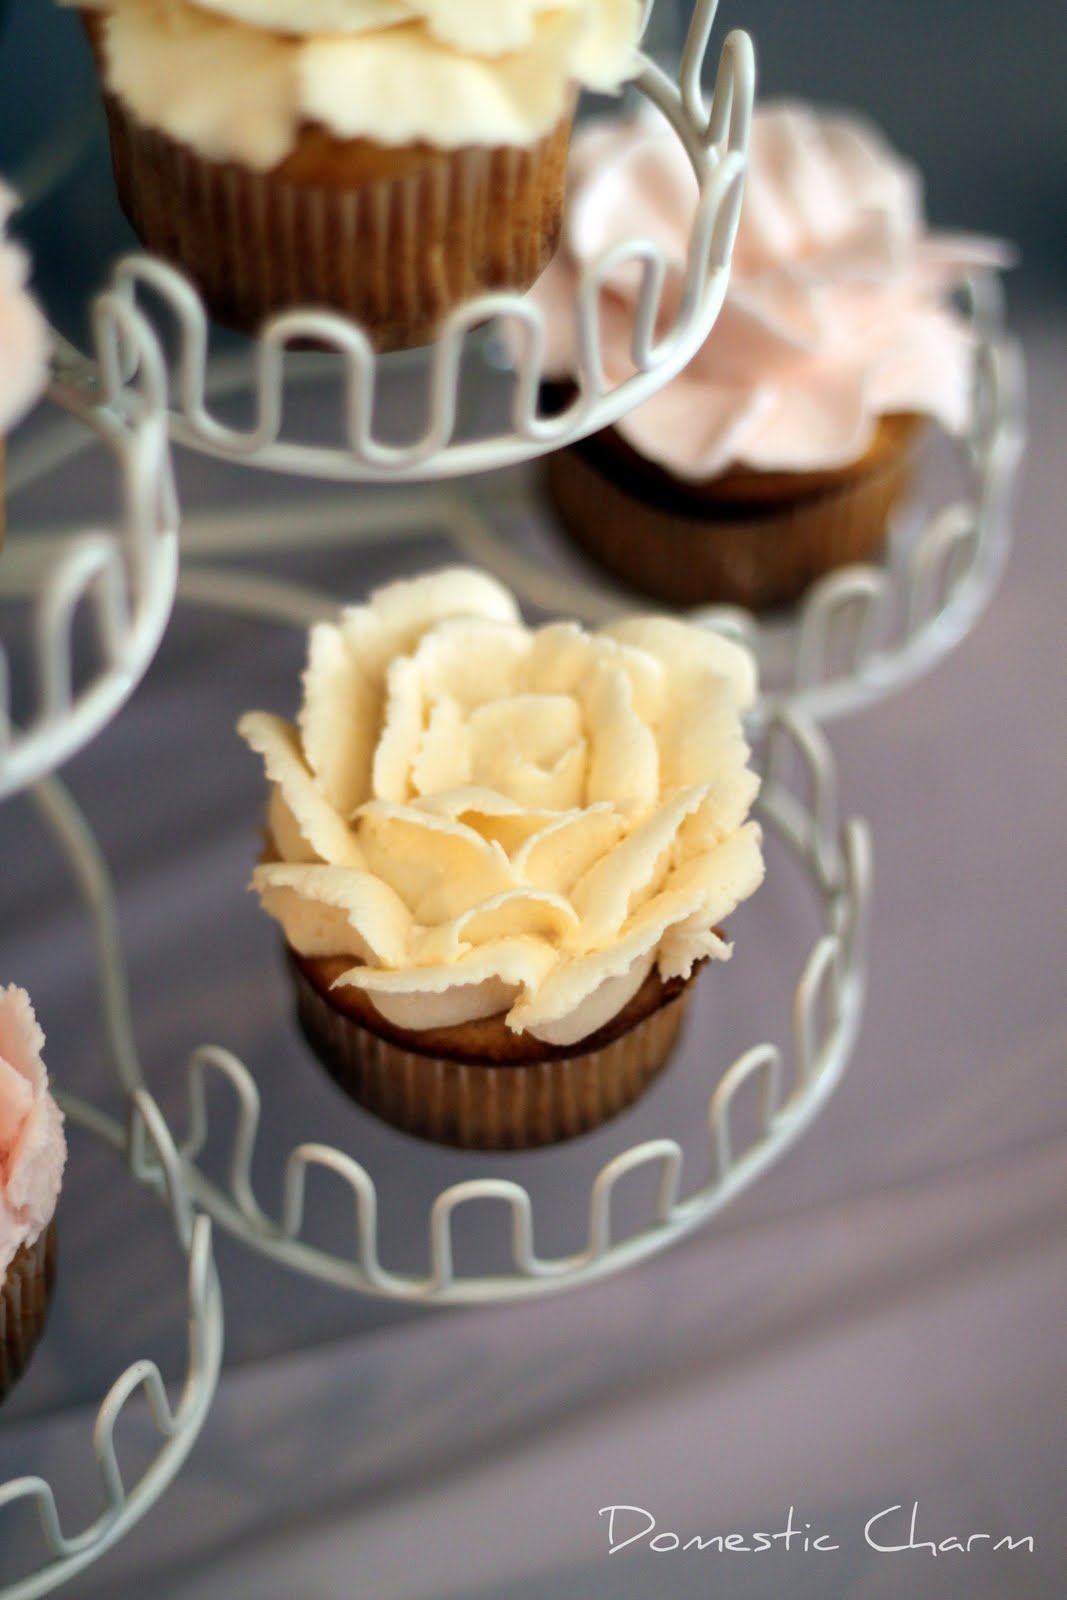
Buttercream Flower Cupcakes


I also made these cupcake for Payton's 1st Birthday party. Amy had found the inspiration on Pinterest here, and I just did my best to make them look like the picture!
I used a large petal tip to decorate them, tip #127 with butter cream frosting. I colored half of my frosting a pale pink and the other half ivory. To create the rose flower you start at the center of the cupcake and hold the tip straight up and down, with the thicker edge of the tip pointed down. It helped me to hold the cupcake in one hand and the frosting bag in the other. For the first petal you circle it around to make just a small opening at the center, like a real rose would look at the center. Then you begin to add petals around, by tilting the tip out the petals will form a more opened looking rose and vice versa.
The other flower is formed by holding the same tip flat (horizontally) against the cupcake top with the thin edge of the tip facing out. You pipe about 6 or 7 petals around the outer edge, then 4 on top of those in the center. I have included the buttercream frosting recipe below. You use a lot of frosting to frost these cupcakes, I made 24 cupcakes and used almost all of the frosting that I made from the recipe below.

Buttercream Frosting:
  • 1 cup butter (2 sticks), softened
  • 1 cup solid white vegetable shortening
  • 2 teaspoons vanilla extract
  • 4 tablespoons heavy cream or milk
  • 2 lbs confectioners' sugar, sifted (about 8 cups)
Using a stand mixer with the paddle attachment cream together the butter, shortening, vanilla, and heavy cream until smooth. Add the sifted confectioners' sugar about 1 to 2 cups at a time. Scraping down the sides of the bowl as needed. Once all of the sugar is added mix at medium high speed for 1 to 2 minutes. If the frosting seems too stiff add more heavy cream 1/2 tablespoon at a time, it will thin out very easily. However, you will want this frosting to be stiff for piping the flowers onto the cupcakes.

Linking up HERE!

Sunday, September 4, 2011

Pink Ruffled Cake


I have seen lots of pictures of this pink ruffle cake on pinterest and made one for my friends little girl Payton. I also made one for Piper for her first birthday with a paper straw birthday candle. Martha Stewart has a recipe here for how to make a pink ruffle cake. There is even a great video you can watch that shows you how to make these adorable little ruffles...sometimes it is much easier to learn something like this by watching instead of reading. You can view the video here on You Tube by My Sweet and Saucy.

I made this one with 2 6" inch cakes and colored my butter cream frosting a pale pink color. Then I used a petal tip, #103 to create the ruffles. You start at the base of the cake with the thinner edge of the petal tip facing you. Then moving the tip back and forth you move up the cake. Creating columns of ruffles until you have gone all the way around the cake. Once you have covered the sides of the cake you can cover the top with ruffles or just frost the top smooth. If doing ruffles, start on the edge and circle around, again with the thin edge of the petal tip facing you. This is easier to do it you have the cake on a turn table. You do this until you reach the center and the whole cake is covered in cute little ruffles! It's really simple and easy to do!


Thursday, September 1, 2011

Best Chocolate Chip Cookie Recipe


So when I make chocolate chip cookies they usually turn out flat...they taste pretty good still. But I have always wanted to make a nice thick chewy chocolate chip cookie! Well, I finally found the recipe... actually my husband found the recipe! We were online the other night in search of another cookie recipe to try, because I usually fail in the chocolate chip cookie department!

This recipe makes big chewy chocolate chip cookies that look like they are right from a bakery! They would be great for packaging in bags for party favors! We made just a few fresh, then scooped the remainder of the dough and put the cookie dough balls into freezer Ziploc bags then in the freezer. Now when we are needing to satisfy our sweet tooth we can grab a couple out of the freezer and bake em! However, they need to bake longer if you are baking them from the freezer. We still baked them at 325 degrees, but for a couple extra minutes on top of the 15-20 minute baking time when the dough is at room temperature. They need to bake so long because each cookie is 1/4 cup of cookie dough! They come out a little crunchy on the outside and chewy in the center.We found the recipe at allrecipes.com, which is an awesome site for finding new recipes if you aren't familiar with it. Here is the link to the recipe below; over 80,500 people have saved the recipe on the site...so I think it is a keeper!


Best Chocolate Chip Cookie Recipe